Advanced UIView shadow effects using shadowPath
Add a little depth to your user interface using shadows
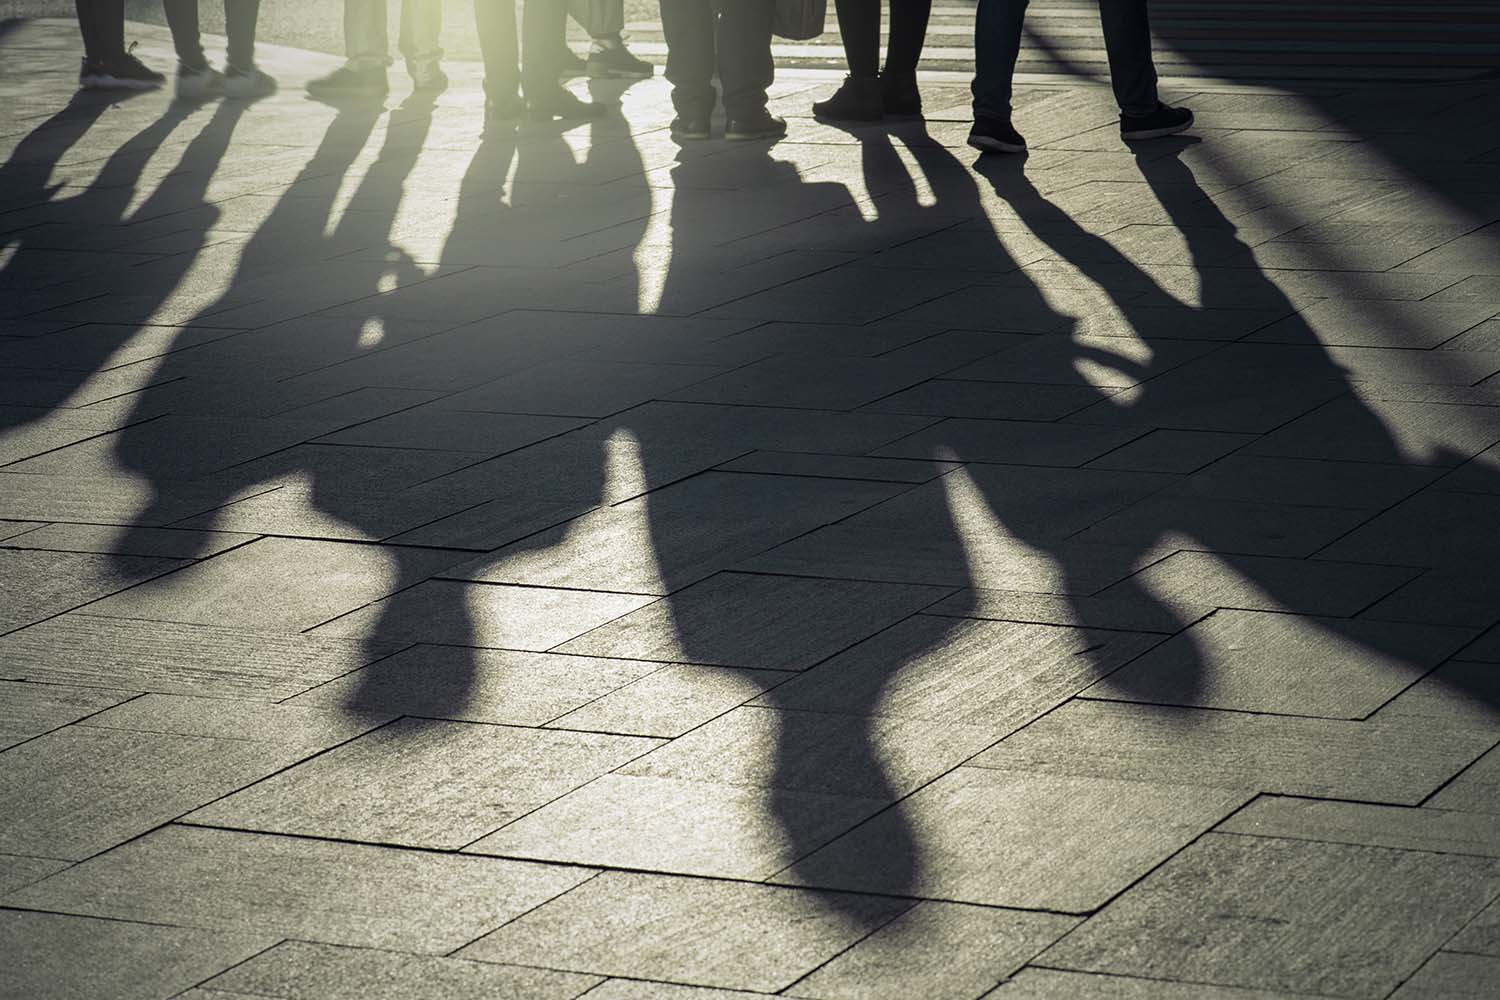
iOS 7 saw many shadows stripped away as Apple shunned skeuomorphism, but in the years since they have crept back in as a useful way to add some depth to your interfaces. Used sparingly, shadows help separate content in your UI, add a touch of depth, and help draw the user’s eye in a certain direction.
In this article we’re going to look at some of the various effects you can create using shadows, all by manipulating the layer properties. Some of these are subtle, some are far from subtle, but I hope they serve to spark your creativity!
TAKE YOUR SKILLS TO THE NEXT LEVEL If you like Hacking with Swift, you'll love Hacking with Swift+ – it's my premium service where you can learn advanced Swift and SwiftUI, functional programming, algorithms, and more. Plus it comes with stacks of benefits, including monthly live streams, downloadable projects, a 20% discount on all books, and free gifts!
Sponsor Hacking with Swift and reach the world's largest Swift community!
Creating a sandbox app
We need something where we can experiment safely, so create a new iOS app using the Single View App template. When it’s created, open ViewController.swift and add this code:
let width: CGFloat = 200
let height: CGFloat = 200

let vw = UIImageView(frame: CGRect(x: 0, y: 0, width: width, height: height))
vw.image = UIImage(named: "YourPictureHere")
vw.center = view.center
view.addSubview(vw)
In this article I’ll be using icons from the Glyphish collection, but you can either substitute your own picture or use a solid color like this:
vw.backgroundColor = .cyanNote: I’ve made width and height separate constants because we’ll be using them later on.
Default shadows
All subclasses of UIView, plus UIView itself, have access to a layer property where we can apply shadow effects directly in code. There are lots of parameters we can tweak:
shadowColorcontrols the color of the shadow, and can be used to make shadows (dark colors) or glows (light colors). This defaults to black.shadowOffsetcontrols how far the shadow is moved away from its view. This defaults to 3 points up from the view.shadowOpacitycontrols how transparent the shadow is. This defaults to 0, meaning “invisible”.shadowPathcontrols the shape of the shadow. This defaults tonil, which causes UIKit to render the view offscreen to figure out the shadow shape.shadowRadiuscontrols how blurred the shadow is. This defaults to 3 points.
Making UIKit calculate the shadow path dynamically is significantly slower than explicitly setting the value, so if you use shadows it’s usually a good idea to set the path. Even better, you can create interesting shapes with the path to make different kinds of shadows, as you’ll see.
First up, let’s set shadowOpacity to 1 so the shadow is fully visible, and you can see what the default settings look like:
vw.layer.shadowOpacity = 1
Like I said, it’s usually a good idea to set an explicit shadow path. This is because dynamic shadow calculation means UIKit performing an off-screen draw of your view to figure out its shape, before rendering the whole thing back to the main view. If you specify the shadow path, UIKit can render the whole thing in one pass.
So, we can specify the shadow path to be the bounds of our view, which tells UIKit we want the shadow to match our view’s size precisely. We could also make its radius bigger while also removing its offset, which means the shadow will appear equally around all edges:
vw.layer.shadowPath = UIBezierPath(rect: vw.bounds).cgPath
vw.layer.shadowRadius = 5
vw.layer.shadowOffset = .zero
vw.layer.shadowOpacity = 1
Contact shadows
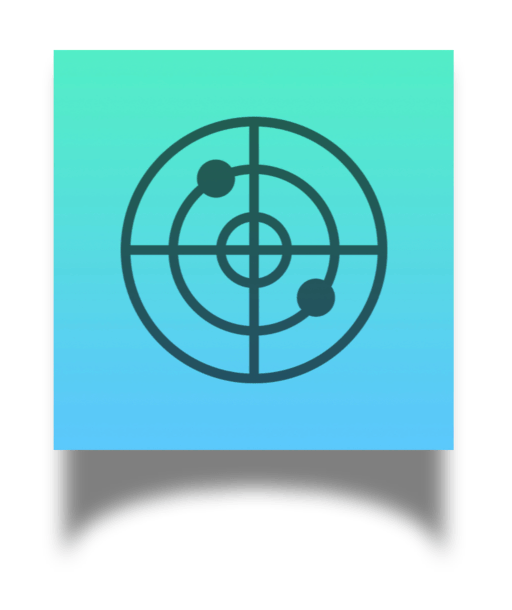
A contact shadow is one that makes it look like our view is near to or even touching a surface, so the shadow exists directly below the view rather than around it.
To make this effect, we’re going to create a custom shadow path. This should be specified as a CGPath, but normally I just create a UIBezierPath then use its cgPath property. In this instance, we can use the ovalIn: initializer for UIBezierPath, making an oval that’s to the left of our X position and positioned right at the bottom of the view. We can then give it a width that’s wider than our view so that the shadow is bigger than the view, and give it a fairly small height.
As an example, this creates a contact shadow that’s 40 points wider than the view, and 20 points high:
let shadowSize: CGFloat = 20
let contactRect = CGRect(x: -shadowSize, y: height - (shadowSize * 0.4), width: width + shadowSize * 2, height: shadowSize)
vw.layer.shadowPath = UIBezierPath(ovalIn: contactRect).cgPath
vw.layer.shadowRadius = 5
vw.layer.shadowOpacity = 0.4
There are two things there I want to highlight briefly before moving on:
- The
shadowSize * 0.4in there really ought to beshadowSize * 0.5, because it positions the shadow’s center at the bottom of the view. However in practice I’ve found 0.4 just looks better – try it yourself. - I reduced the
shadowOpacityvalue down to 0.5 because looks less harsh.
Here’s how that looks:
If you wanted, you could introduce a second constant that moves the shadow further away from the view, making it look like the view is floating:
let shadowSize: CGFloat = 20
let shadowDistance: CGFloat = 20
let contactRect = CGRect(x: -shadowSize, y: height - (shadowSize * 0.4) + shadowDistance, width: width + shadowSize * 2, height: shadowSize)
vw.layer.shadowPath = UIBezierPath(ovalIn: contactRect).cgPath
vw.layer.shadowRadius = 5
vw.layer.shadowOpacity = 0.4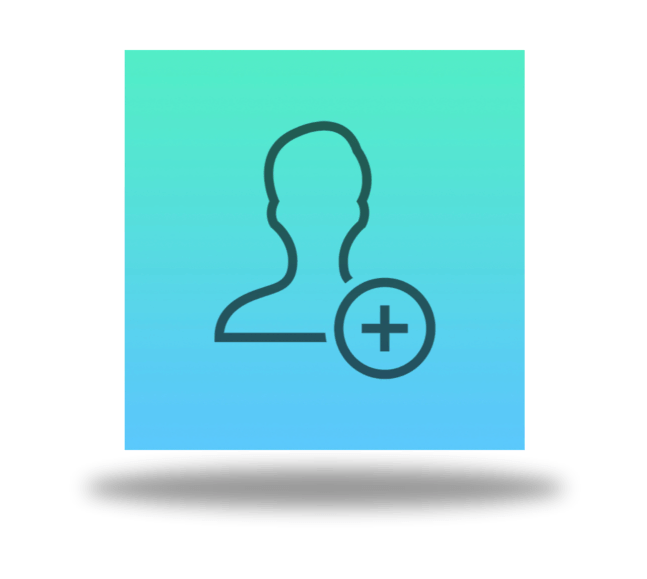
When you add that sort of distance, you might find it works better to make the contact shadow smaller than the view, which re-enforces the height effect nicely:
let shadowSize: CGFloat = 10
let shadowDistance: CGFloat = 40
let contactRect = CGRect(x: shadowSize, y: height - (shadowSize * 0.4) + shadowDistance, width: width - shadowSize * 2, height: shadowSize)
vw.layer.shadowPath = UIBezierPath(ovalIn: contactRect).cgPath
vw.layer.shadowRadius = 5
vw.layer.shadowOpacity = 0.4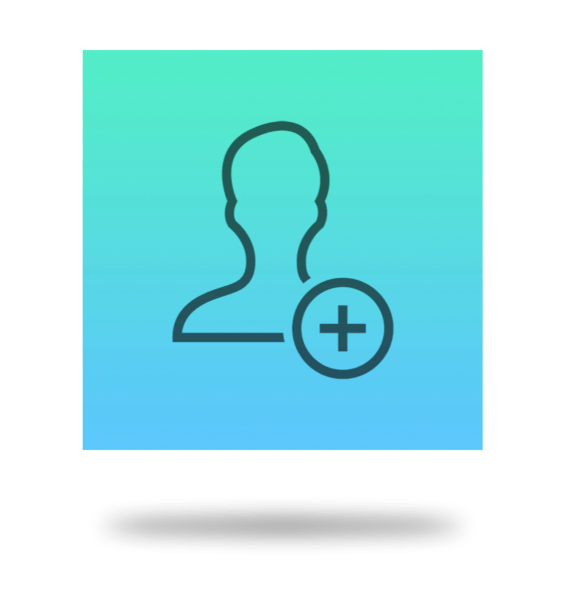
Depth shadows
You can add a 3D effect to your view by casting a shadow in front of it. This is done by creating another custom UIBezierPath shadow path where we position the top of the shadow at the bottom of our view, and the bottom of the shadow some distance further down. We then bring the bottom edges of the shadow outwards so that it’s wider on the bottom than it is at the top, giving a perspective effect.
To avoid the shadow looking like it’s wider than the view at its start point, it’s important we move it in by half the shadow radius and make it draw along to the width of our view also minus half the shadow radius. I’ve also brought the start of the shadow up by half the shadow radius so that you don’t get a blurred space underneath the view.
Here’s the code:
let shadowRadius: CGFloat = 5

// how wide and high the shadow should be, where 1.0 is identical to the view
let shadowWidth: CGFloat = 1.25
let shadowHeight: CGFloat = 0.5

let shadowPath = UIBezierPath()
shadowPath.move(to: CGPoint(x: shadowRadius / 2, y: height - shadowRadius / 2))
shadowPath.addLine(to: CGPoint(x: width - shadowRadius / 2, y: height - shadowRadius / 2))
shadowPath.addLine(to: CGPoint(x: width * shadowWidth, y: height + (height * shadowHeight)))
shadowPath.addLine(to: CGPoint(x: width * -(shadowWidth - 1), y: height + (height * shadowHeight)))
vw.layer.shadowPath = shadowPath.cgPath
vw.layer.shadowRadius = shadowRadius
vw.layer.shadowOffset = .zero
vw.layer.shadowOpacity = 0.2
For a more interesting perspective, you could push the shadow off to one side. For example:
let shadowWidth: CGFloat = 1.2
let shadowHeight: CGFloat = 0.5
let shadowOffsetX: CGFloat = -50
let shadowRadius: CGFloat = 5

let shadowPath = UIBezierPath()
shadowPath.move(to: CGPoint(x: shadowRadius / 2, y: height - shadowRadius / 2))
shadowPath.addLine(to: CGPoint(x: width, y: height - shadowRadius / 2))
shadowPath.addLine(to: CGPoint(x: width * shadowWidth + shadowOffsetX, y: height + (height * shadowHeight)))
shadowPath.addLine(to: CGPoint(x: width * -(shadowWidth - 1) + shadowOffsetX, y: height + (height * shadowHeight)))
vw.layer.shadowPath = shadowPath.cgPath

vw.layer.shadowRadius = shadowRadius
vw.layer.shadowOffset = .zero
vw.layer.shadowOpacity = 0.2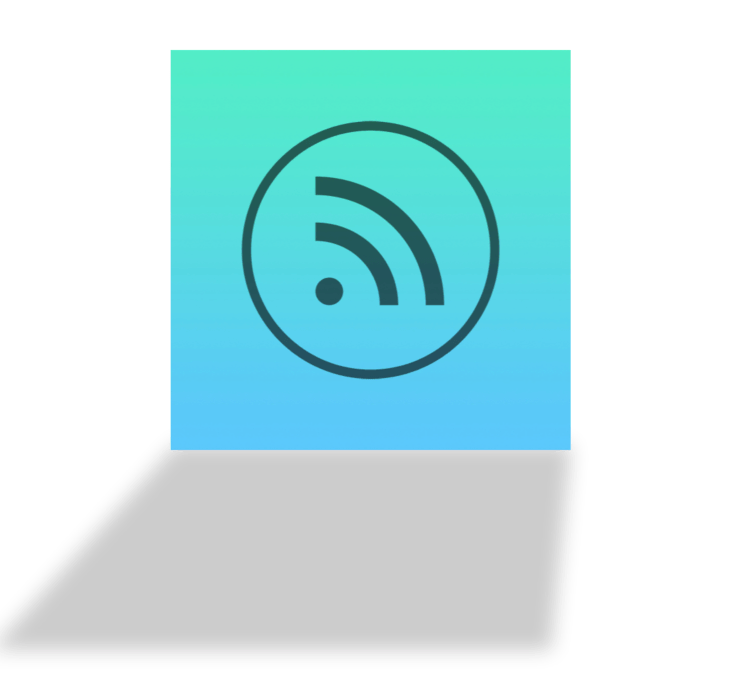
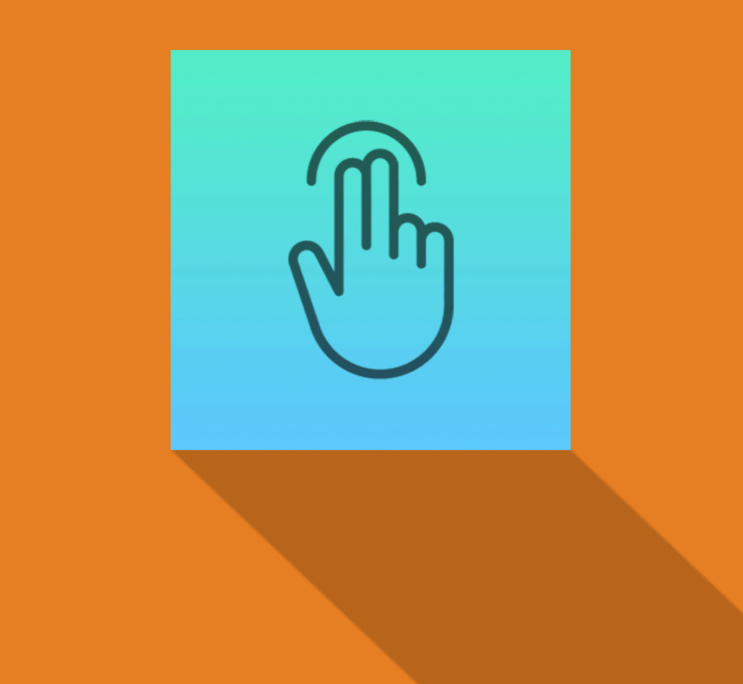
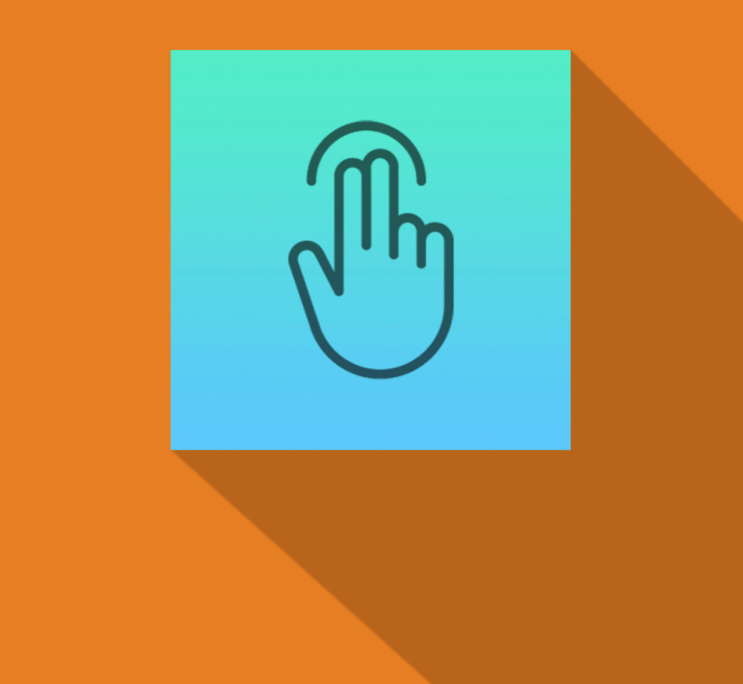
Flat, long shadows
This shadow effect is particularly prevalent in modern design, where shadows are more of a design feature rather than providing any sort of function. Here, the shadow is sharp-edged and moves continuously off into the infinite distance at 45-degree angle.
We can achieve this effect using a similar technique to our depth shadows, except rather than making the shadow wider at the bottom edge we instead push it off to the side and away into the far distance. How far is down to you, but something large like 2000+ points should ensure you don’t have any problems for the foreseeable future!
To make the effect a little more dramatic, I’m going to add an orange color to my view then use a translucent shadow so that the shadow color is blended between black and orange.
Here’s the code:
vw.layer.shadowRadius = 0
vw.layer.shadowOffset = .zero
vw.layer.shadowOpacity = 0.2

// how far the bottom of the shadow should be offset
let shadowOffsetX: CGFloat = 2000
let shadowPath = UIBezierPath()
shadowPath.move(to: CGPoint(x: 0, y: height))
shadowPath.addLine(to: CGPoint(x: width, y: height))

// make the bottom of the shadow finish a long way away, and pushed by our X offset
shadowPath.addLine(to: CGPoint(x: width + shadowOffsetX, y: 2000))
shadowPath.addLine(to: CGPoint(x: shadowOffsetX, y: 2000))
vw.layer.shadowPath = shadowPath.cgPath

view.backgroundColor = UIColor(red: 230 / 255, green: 126 / 255, blue: 34 / 255, alpha: 1.0)
You can manipulate shadowOffsetX to get different angles – using 1000 will make the shadow move to the right more gently, whereas using negative values will make it move to the left.
For a more dramatic shadow, you can go from the bottom-left and top-right edges, like this:
let shadowOffsetX: CGFloat = 2000
let shadowPath = UIBezierPath()
shadowPath.move(to: CGPoint(x: 0, y: height))
shadowPath.addLine(to: CGPoint(x: width, y: 0))
shadowPath.addLine(to: CGPoint(x: width + shadowOffsetX, y: 2000))
shadowPath.addLine(to: CGPoint(x: shadowOffsetX, y: 2000))
vw.layer.shadowPath = shadowPath.cgPath
Here’s how that looks:
Curved shadows
You can use any sort of UIBezierPath for your shadow path, which means if you add some curves it’s easy to make a page curl effect similar to the kind of thing you’ll find in Apple’s Keynote.
To create this effect, we draw three corners of a box, and add the fourth corner using a Bezier curve that bends upwards back towards our view. As with previous examples we need to nudge in the X positions of our shadow to account for the shadow radius, but this time we’ll subtract the whole shadow radius rather than half so that the whole shadow sits inside the view’s width.
Here’s the code:
let shadowRadius: CGFloat = 5
vw.layer.shadowRadius = shadowRadius
vw.layer.shadowOffset = CGSize(width: 0, height: 10)
vw.layer.shadowOpacity = 0.5

// how strong to make the curling effect
let curveAmount: CGFloat = 20
let shadowPath = UIBezierPath()

// the top left and right edges match our view, indented by the shadow radius
shadowPath.move(to: CGPoint(x: shadowRadius, y: 0))
shadowPath.addLine(to: CGPoint(x: width - shadowRadius, y: 0))

// the bottom-right edge of our shadow should overshoot by the size of our curve
shadowPath.addLine(to: CGPoint(x: width - shadowRadius, y: height + curveAmount))

// the bottom-left edge also overshoots by the size of our curve, but is added with a curve back up towards the view
shadowPath.addCurve(to: CGPoint(x: shadowRadius, y: height + curveAmount), controlPoint1: CGPoint(x: width, y: height - shadowRadius), controlPoint2: CGPoint(x: 0, y: height - shadowRadius))
vw.layer.shadowPath = shadowPath.cgPath
Experimentation pays off with this particular effect, so try out various values and see what works well for you. I chose a particularly strong effect for the picture below so that it really stands out, but you’ll likely find something more subtle works better.
Double strokes
As well as shadows, CALayer also provides us with the ability to draw borders around our views by setting the borderWidth and borderColor properties. If we combine that with a shadow that has a zero radius and offset, we can make a double border effect: the regular border first, then a hard shadow outside to provide a second border.
To make this work, all we need to do is create a shadow path that starts above and to the left of our view, and finishes below and to the right. You can make the shadow a multiple of the border if you want it to be relative, or you can used fixed sizes.
For example, this code creates a picture frame effect, where the white border acts as negative space and the black edge is a frame:
let shadowSize: CGFloat = 20
let shadowPath = UIBezierPath(rect: CGRect(x: -2, y: -2, width: width + 4, height: height + 4))
vw.layer.shadowPath = shadowPath.cgPath

vw.layer.shadowOffset = .zero
vw.layer.shadowRadius = 0
vw.layer.shadowOpacity = 1

vw.layer.borderColor = UIColor.white.cgColor
vw.layer.borderWidth = shadowSize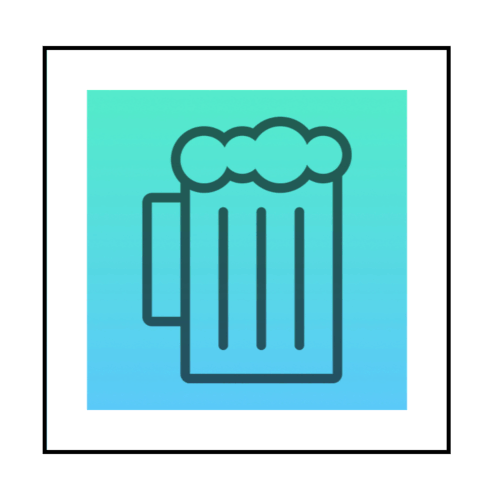
Where next?
We’ve experimented with shadow colors, paths, and more, but there’s so much more you can do if you experiment – anything you can create as a bezier path can be used for the shadow, so the options really are limitless.
What are your favorite shadow effects? Link me to your code and I’ll check it out – I’m @twostraws on Twitter.
BUILD THE ULTIMATE PORTFOLIO APP Most Swift tutorials help you solve one specific problem, but in my Ultimate Portfolio App series I show you how to get all the best practices into a single app: architecture, testing, performance, accessibility, localization, project organization, and so much more, all while building a SwiftUI app that works on iOS, macOS and watchOS.
Sponsor Hacking with Swift and reach the world's largest Swift community!


