Trees
Trees are an extraordinarily simple, extraordinarily useful data type, and in this article we’ll make a complete tree data type using Swift in just a few minutes. But rather than just stop there, we’re going to do something quite beautiful that I hope will blow your mind while teaching you something useful.
Watch the video here, or read the article below
If you’d like to follow along with this tutorial, create a new macOS command-line app in Xcode.
Quick links
- The basics of trees
- Making it more useful
- Classes vs structs
- Adding some sparkle
- Further reading
- Challenges
The basics of trees
A tree data structure is one where a single root object has several children, and each of those children can have their own children, and so on. We give it the name “tree” because a tree has a single trunk at its base, then has several thick branches coming off that trunk, and many smaller branches coming off those, and so on.
Each object in the tree holds its own value, such as an integer or a string, as well as an array of its children.
It’s common to hear some specialized terminology with trees:
- The root object is where your tree begins, like its trunk.
- A branch object is one part of your tree that has more branches coming off it.
- A leaf object is one part of your tree that has no branches coming off it.
All three of those – root, branch, and leaf – are generally just called “nodes”, because although in practice they have different configurations they ultimately they are the same thing: a single value, plus an array of children.
Some people like to have a separate Tree structure that has a root node property, but that isn’t necessary – if we make all three parts of our tree the same type then it becomes possible to carve off subtrees just by referring to a specific node in the tree.
Enough talk, let’s build a basic tree. We want this to hold any kind of value, so we can make it generic like this:
struct Node<Value> {
    var value: Value
    var children: [Node]
}
That already works, but with a couple of small changes we can make it much nicer.
First, that children property is exposed to the world, which means anyone can manipulate it freely. Sometimes that’s what you want, but it’s usually better to have control over this sort of thing so you can add logging or other functionality in one central location.
So, we can make children read-only for external users, while keeping it modifiable for methods inside Node:
private(set) var children: [Node]Now that writing to our array is private, we need a simple method to add children externally:
mutating func add(child: Node) {
    children.append(child)
}
Second, the synthesized memberwise initializer for Node requires us to pass both a value and a children array, but when we’re creating nodes often we don’t want to pass in any children at all.
We can make this much nicer by adding two custom initializers: one that accepts just a value, and one that accepts a value and an array of children. Both of these will use no external parameter label for the value, because I think it makes creating nodes more natural – we would write Node(5) rather than Node(value: 5).
Add these two to Node now:
init(_ value: Value) {
    self.value = value
    children = []
}

init(_ value: Value, children: [Node]) {
    self.value = value
    self.children = children
}
And that gives us a pretty good first pass at a tree – we can now create some nodes that model part of my family, and connect them up:
var andrew = Node("Andrew")
let john = Node("John")
andrew.add(child: john)

var paul = Node("Paul")
let sophie = Node("Sophie")
let charlotte = Node("Charlotte")
paul.add(child: sophie)
paul.add(child: charlotte)

var root = Node("Terry")
root.add(child: andrew)
root.add(child: paul)
Because these are all structs, Swift does a pretty good job of printing them out neatly. For example, we can print everything from the root:
print(root)Or just print out one branch:
print(paul)Making it more useful
To make our tree genuinely useful, we need to add at least three things to it:
- The ability to compare one node against another, so we can tell if two nodes have the same value and children.
- The ability to know the size of the tree, telling us how many items in total it is.
- The ability to find a specific node in the tree, if it exists.
I’ve arranged those tasks from easy to hard, but to be honest none of them are that challenging – like I said at the beginning, trees are extraordinarily simple things!
First, if we have two nodes that are identical – i.e., they have the same value and have children that are also identical – then we should be able to use == with them to get back true or false. This needs to check all children, all grandchildren, all great-grandchildren, and so on, so that one entire tree is compared against another.
That might sound like a lot of work, but actually it’s effectively no work at all: we can tell Swift that Node conforms to the Equatable protocol as long as the value type it’s storing also conforms to Equatable, and, well, that’s it. Thanks to conditional conformance, Swift will take care of the rest of the functionality for us, so we just write an empty extension.
Here, try it out now:
extension Node: Equatable where Value: Equatable { }Literally no code in there; Swift is doing everything. And yet already we can write code like this:
print(paul == andrew)
print(paul != andrew)
print(paul == paul)
Isn’t that just amazing?
But why stop there? We can also make our nodes hashable if their values are hashable:
extension Node: Hashable where Value: Hashable { }We can even make them codable using the same approach, allowing us to encode and decode entire trees of items:
extension Node: Codable where Value: Codable { } I don’t know about you, but I will never cease to be amazed by conditional conformances in Swift.
Moving on, the second change I improvement to make is a way to know the total size of a tree, returning a single integer count of all items we have.
Making this work only really requires one line of code, but it’s a recursive line: this code will call itself, which allows us to traverse the entire tree.
If our root node has two children, then the total size of the tree is 3: one for the root node, plus the count of the children. If both of those children have two children, then we have one for the root node, plus one for each of the root children, plus the count of the grandchildren, making 7 in total.
Expressed in a more general way, the count for any part of the tree is equal to 1 plus the count property of each of its children. This is what makes our code recursive: fetching the size of a child node means counting its children, which will count its grandchildren, and so forth.
Swift actually lets us sum this up in a beautifully simple way – add this property to the Node struct node:
var count: Int {
    1 + children.reduce(0) { $0 + $1.count }
}
To be clear, there is a big difference between $1.children.count and $1.count: the former will return how many nodes are inside the children array, whereas the latter will use our custom count property to recurse through all the children, grandchildren, and so on.
And boom, that’s it – we can now get an accurate count for any part of our tree. So, this will print 6, 2, then 3:
print(root.count)
print(andrew.count)
print(paul.count)
Our final improvement is to add a way to find a node inside our tree, so that we can say “give me the node with the value Paul,” and get it back if it exists. Once we have that we can read its children, grandchildren, etc, or just pull it out as a tree in its own right.
Just like reading the size of our tree, this needs to be recursive so that we can keep digging through all levels of our tree, but it also needs to be constrained so that we have a way of actually checking that a particular node value is the one we’re looking for.
Right now, our Node struct is generic over any kind of value, and we don’t want to change that. Instead, we’re going to make an extension constrained to Equatable values, allowing us to check whether the current node, or any of its children, match a particular value.
Remember, this needs to be recursive, which means we’ll look through all the children in our array and call find() on each of them. As soon as one returns a node we’ll send it back, but if we get through all of them without a match then we’ll send back nil instead.
Here’s that in code:
extension Node where Value: Equatable {
    func find(_ value: Value) -> Node? {
        if self.value == value {
            return self
        }

        for child in children {
            if let match = child.find(value) {
                return match
            }
        }

        return nil
    }
}
Now we can write code to find a particular node, and print out how many child nodes it has:
if let paul = root.find("Paul") {
    print(paul.count)
}
Classes vs structs
Before we move on, there’s one interesting behavior I want to mention because it might hit you by accident.
Earlier we modeled part of my family tree, including me and my two kids:
var paul = Node("Paul")
let sophie = Node("Sophie")
let charlotte = Node("Charlotte")

paul.add(child: sophie)
paul.add(child: charlotte)
If in the future Sophie had a child, we might model that like so:
var paul = Node("Paul")
Var sophie = Node("Sophie")
let charlotte = Node("Charlotte")

paul.add(child: sophie)
paul.add(child: charlotte)

let taylor = Node("Taylor")
sophie.add(child: taylor)
Note: You’ll need to change Sophie from let to var so we can modify her after creation.
The problem is that our Node type is a struct rather than a class, so we’ve created some inconsistency here: when Sophie was added to my list of children I got a unique copy of her node, and when later we added Taylor to Sophie’s children that didn’t affect my data – my copy of Sophie will still have no children.
So, printing paul.count will still print 3: myself, plus my two daughters. On the other hand, if we had moved the two new lines before the calls to paul.add(child:) then we would get 4, because my copy of the Sophie node would include Taylor too.
This is a direct side effect of us using structs, because each copy of the struct is unique rather than shared. If you want to change this then you should make Node into a final class instead, but a side effect of that is needing to implement Equatable and Hashable by hand.
This doesn’t take a great deal of work, so let’s try it out in case you were curious.
First, change struct Node to this:
final class Node {Second, drop the mutating keyword from the add(child:) method, because that is no longer needed:
func add(child: Node) {And now add custom conformances for both Equatable and Hashable, using both properties from our class:
extension Node: Equatable where Value: Equatable {
    static func ==(lhs: Node, rhs: Node) -> Bool {
        lhs.value == rhs.value && lhs.children == rhs.children
    }
}

extension Node: Hashable where Value: Hashable {
    func hash(into hasher: inout Hasher) {
        hasher.combine(value)
        hasher.combine(children)
    }
}
Personally I’m not a big fan of this change. Yes, it means you can adjust any part of your tree in place and you won’t have to worry about the order in which you add children, but it can also create havoc if you pull out a subtree – you might expect that you can modify that subtree separately from the original tree, but changing one will in fact change both.
Try out both and see which you prefer!
Adding some sparkle
At this point our tree type is complete, either as a struct or as a class, and we can compare nodes, hash them, encode and decode them, and even search for specific values.
This all works great, but we can do better. You see, making trees is quite annoying: there are lots of nodes being created, and lots of calls to add(child:) too. Plus, if you’re using structs rather than classes, the order in which you create things matters even though it isn’t immediately obvious.
We can significantly improve the whole way we create trees in just a handful of lines of code thanks to function builders: a Swift 5.1 feature that lets us convert several components into a single value.
Function builders are huge, powerful, and complex things, but here we just need the tiniest of function builders to make some real magic happen. Like I said, function builders are designed to convert several values – in our case tree nodes – into a single value – in our case an array of tree nodes, because that’s matches the children array we have in our type.
One of the helpful features of function builders is that you only need to implement functionality for the parts you care about. In this case we don’t need to worry about conditions, loops, or other language features, but instead just one thing: if we’re given a variadic array of nodes, we need to convert that into a regular array of nodes that can be used for node children.
As you know, variadic parameters in Swift are automatically converted into arrays of those values, so our method can just send back the parameter directly.
Here’s how that looks in code:
@functionBuilder
struct NodeBuilder {
    static func buildBlock<Value>(_ children: Node<Value>...) -> [Node<Value>] {
        children
    }
}
Note: If you’re using any version of Swift before the final release of Swift 5.3, you must place an underscore after the @ sign, like this: @_functionBuilder.
That’s literally our entire function builder written, so we can start using that immediately by adding a third initializer to Node that accepts a value plus a NodeBuilder function that returns its children when called:
init(_ value: Value, @NodeBuilder builder: () -> [Node]) {
    self.value = value
    self.children = builder()
}
That’s our Node type fully upgraded, and it completely redefines the way we can make trees. Sure, we can still use the old manual approach if you want, but now we can use SwiftUI-like function builders that are much more natural:
let terry = Node("Terry") {
    Node("Paul") {
        Node("Sophie")
        Node("Lottie")
    }

    Node("Andrew") {
        Node("John")
    }
}
This way there’s no ambiguity about which child belongs where, or which order you should create things, because they are placed directly inside their parents.
Although function builders aren’t to everyone’s tastes, it’s great to have it as an option here – use them if you prefer them, or take the manual approach instead.
Further reading
If you’re curious how function builders work, Becca Royal-Gordon wrote a function builder designed to help you understand what the compiler is doing when it works with all possible function builder calls. I forked it on GitHub so the URL is permanent: https://gist.github.com/twostraws/f100939331eb87122149af7178ddde1a
Challenges
If you’d like to take this tutorial further, here are some suggestions:
- Implement the
Comparableprotocol forNode. Note: tree nodes that are comparable don’t need to compare their child arrays because that wouldn’t make sense. - Add a new property called
parentthat lets children weakly store a reference to their parent. What impact does this have on the class vs struct question?
If you liked this, you'd love Hacking with Swift+…
Here's just a sample of the other tutorials, with each one coming as an article to read and as a 4K Ultra HD video.
Find out more and subscribe here
24:11
ADVANCED SWIFT
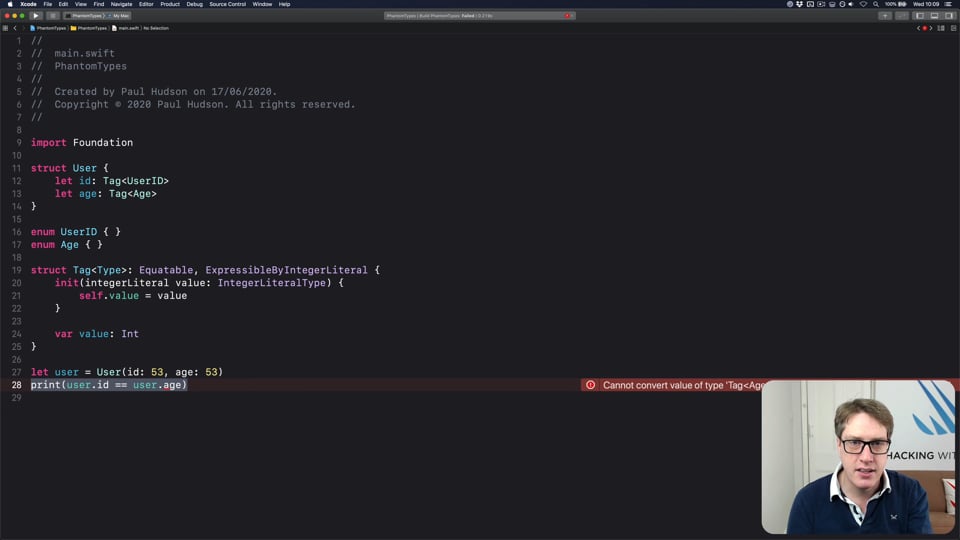
FREE: How to use phantom types in Swift
Phantom types are a powerful way to give the Swift compiler extra information about our code so that it can stop us from making mistakes. In this article I’m going to explain how they work and why you’d want them, as well as providing lots of hands-on examples you can try.

11:03
ULTIMATE PORTFOLIO APP
FREE: Ultimate Portfolio App: Introduction
UPDATED: While I’m sure you’re keen to get started programming immediately, please give me a few minutes to outline the goals of this course and explain why it’s different from other courses I’ve written.
23:07
ADVANCED SWIFT
FREE: Making the most of optionals
Swift’s optionals are implemented as simple enums, with just a little compiler magic sprinkled around as syntactic sugar. However, they do much more than people realize, and in this article I’m going to demonstrate some of their power features that can really help you write better code – and blow your mind along the way.
42:32
FUNCTIONAL PROGRAMMING
FREE: Transforming data with map()
In this article we’re going to look at the map() function, which transforms one thing into another thing. Along the way we’ll also be exploring some core concepts of functional programming, so if you read no other articles in this course at least read this one!
27:33
INTERMEDIATE SWIFT
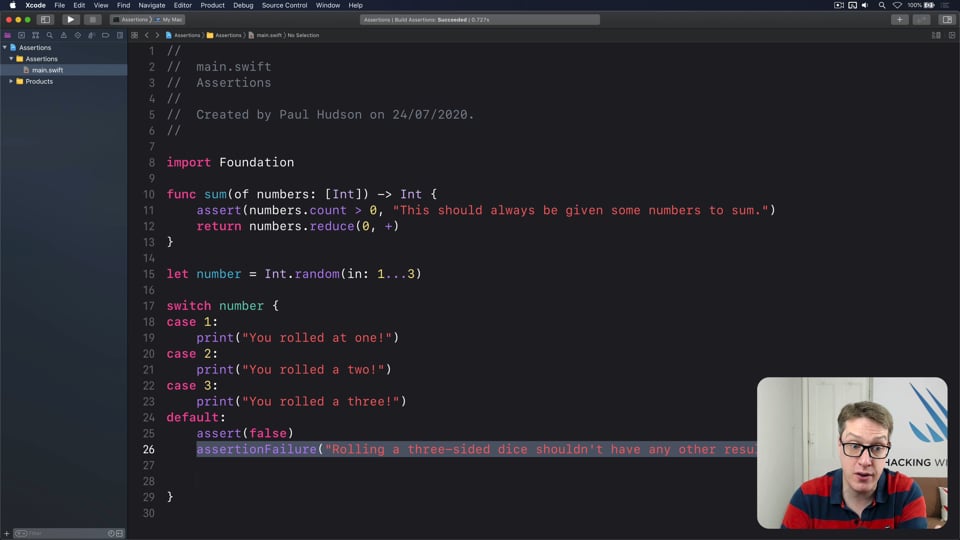
FREE: Understanding assertions
Assertions allow us to have Swift silently check the state of our program at runtime, but if you want to get them right you need to understand some intricacies. In this article I’ll walk you through the five ways we can make assertions in Swift, and provide clear advice on which to use and when.

6:52
FUNCTIONAL PROGRAMMING
FREE: Functional programming in Swift: Introduction
Before you dive in to the first article in this course, I want to give you a brief overview of our goals, how the content is structured, as well as a rough idea of what you can expect to find.
14:26
NETWORKING
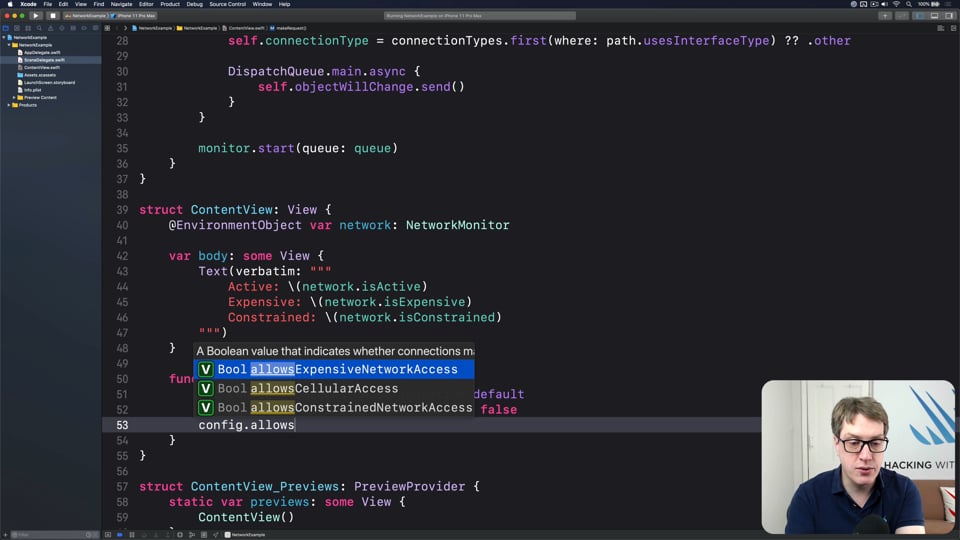
FREE: User-friendly network access
Anyone can write Swift code to fetch network data, but much harder is knowing how to write code to do it respectfully. In this article we’ll look at building a considerate network stack, taking into account the user’s connection, preferences, and more.
20:01
INTERMEDIATE SWIFT
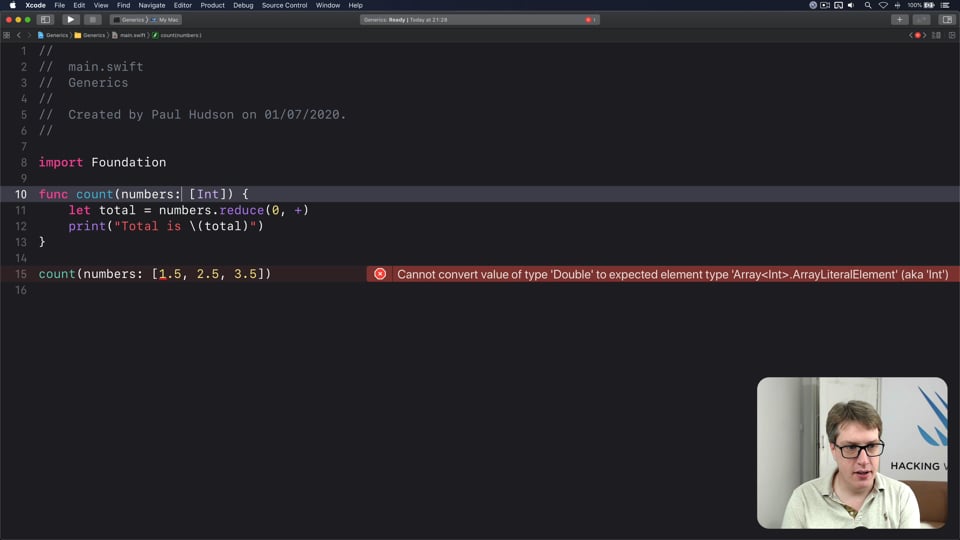
FREE: Understanding generics – part 1
Generics are one of the most powerful features of Swift, allowing us to write code once and reuse it in many ways. In this article we’ll explore how they work, why adding constraints actually helps us write more code, and how generics help solve one of the biggest problems in Swift.
19:50
SWIFTUI SPECIAL EFFECTS
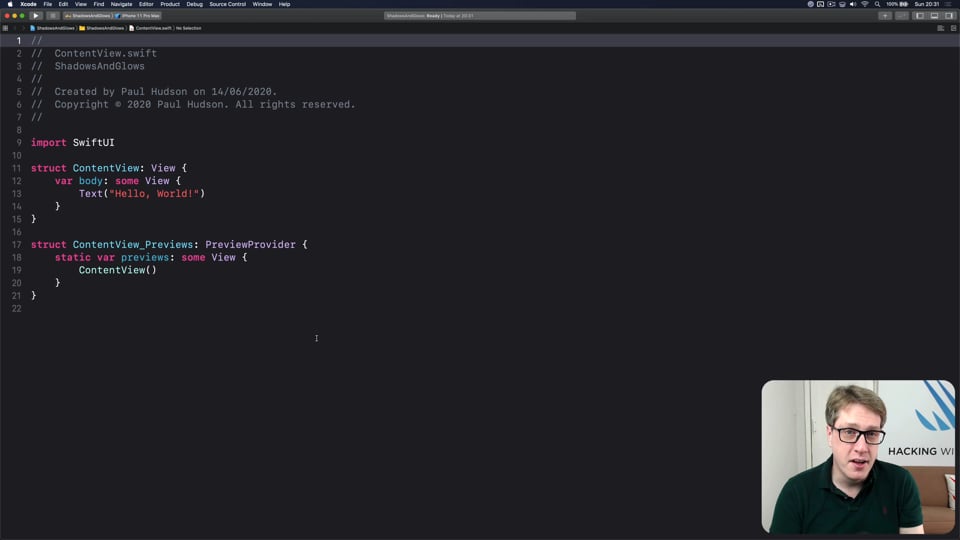
FREE: Shadows and glows
SwiftUI gives us a modifier to make simple shadows, but if you want something more advanced such as inner shadows or glows, you need to do extra work. In this article I’ll show you how to get both those effects and more in a customizable, flexible way.
32:08
CUSTOM SWIFTUI COMPONENTS
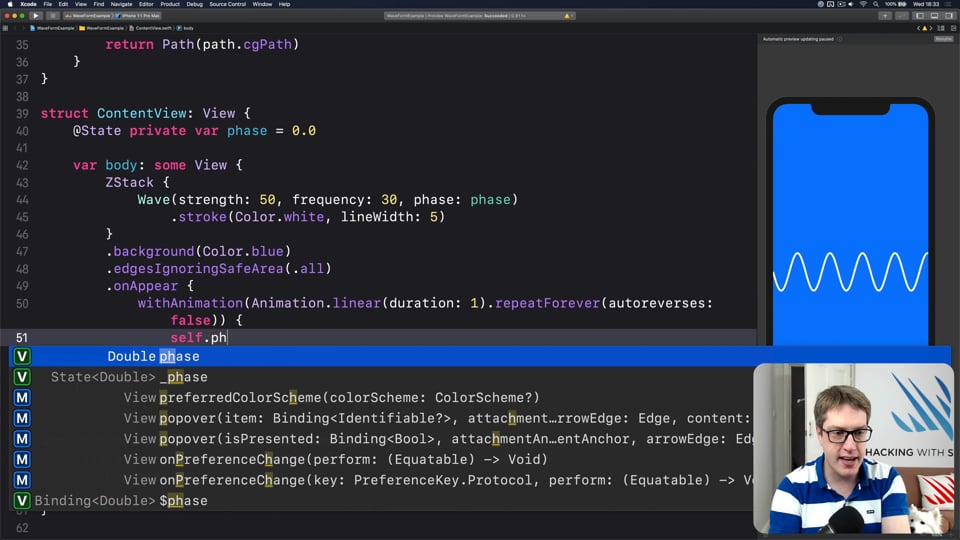
FREE: Creating a WaveView to draw smooth waveforms
In this article I’m going to walk you through building a WaveView with SwiftUI, allowing us to create beautiful waveform-like effects to bring your user interface to life.
36:18
HIGH-PERFORMANCE APPS
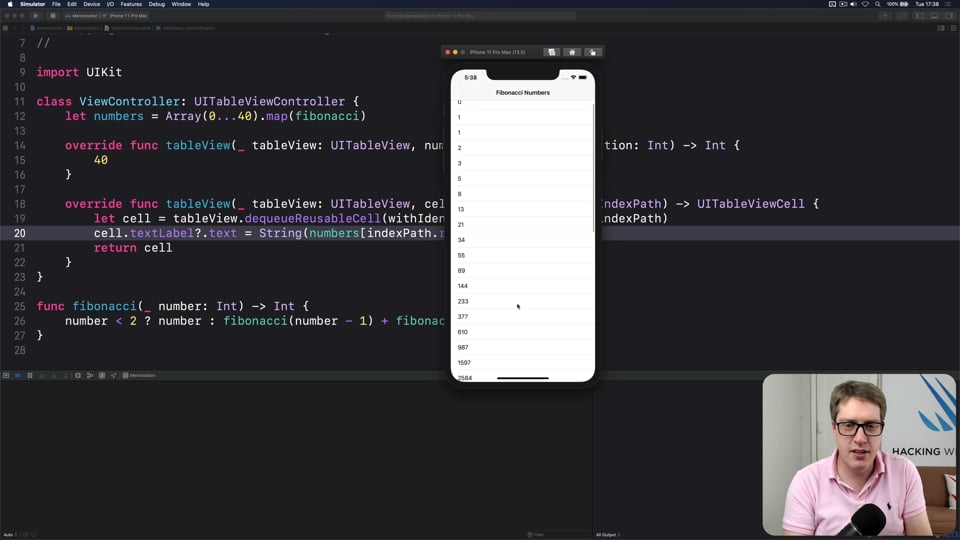
FREE: Using memoization to speed up slow functions
In this article you’ll learn how memoization can dramatically boost the performance of slow functions, and how easy Swift makes it thanks to its generics and closures.
14:20
INTERMEDIATE SWIFTUI
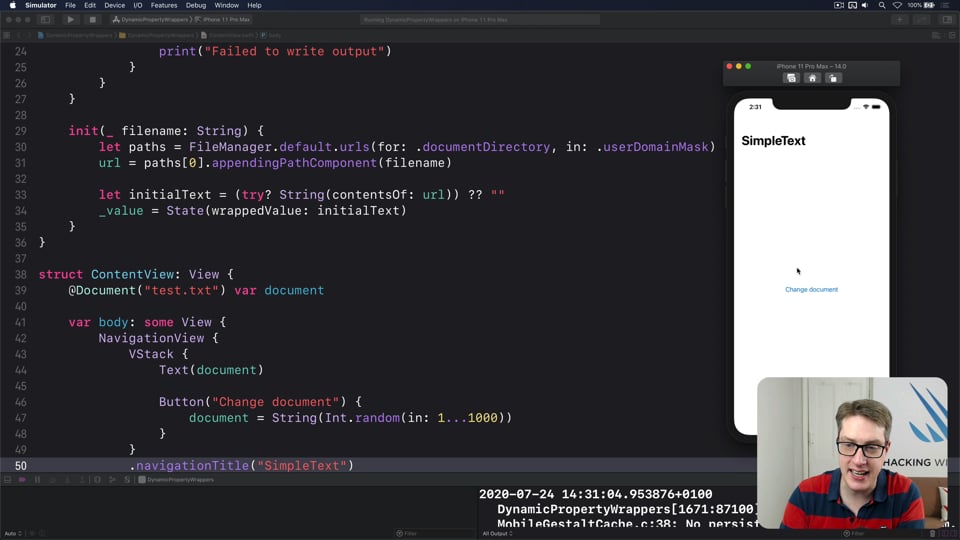
FREE: Creating a custom property wrapper using DynamicProperty
It’s not hard to make a basic property wrapper, but if you want one that automatically updates the body property like @State you need to do some extra work. In this article I’ll show you exactly how it’s done, as we build a property wrapper capable of reading and writing documents from our app’s container.

3:54
INTERVIEW QUESTIONS
FREE: Interview questions: Introduction
Getting ready for a job interview is tough work, so I’ve prepared a whole bunch of common questions and answers to help give you a jump start. But before you get into them, let me explain the plan in more detail…
13:28
SOLUTIONS
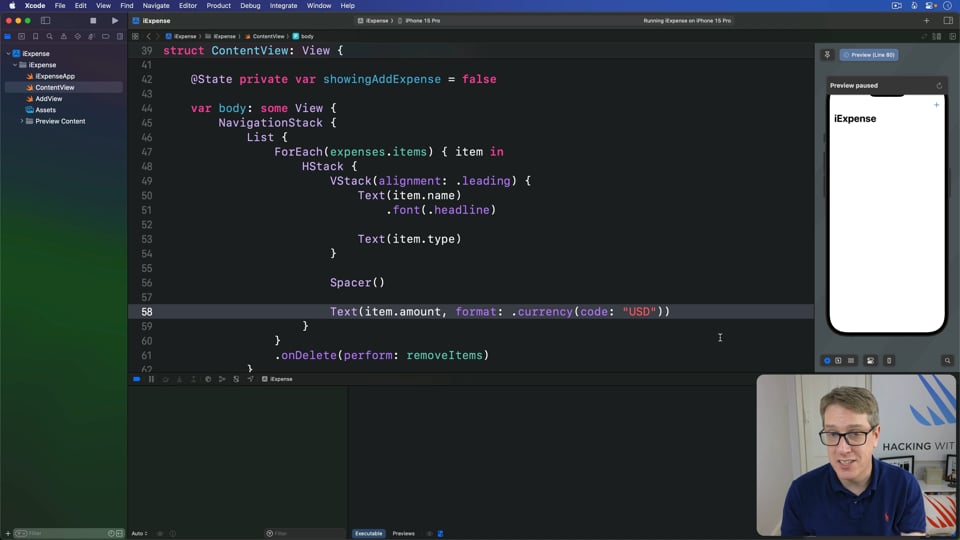
iExpense
This challenge asks you to support the user’s preferred currency symbol, style your expenses somehow, then split the list into two sections. Let’s tackle it now…
56:38
EVENTS
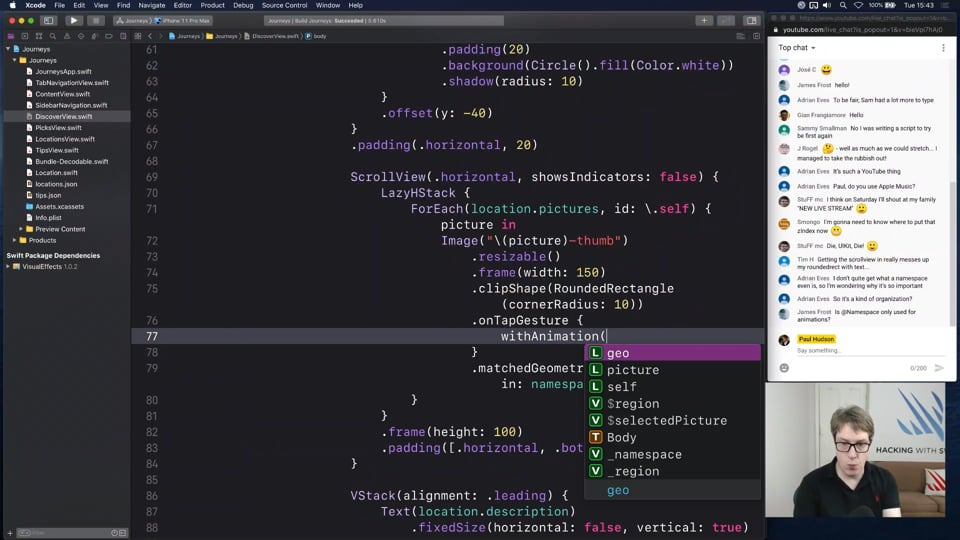
Adding matched geometry effects to Journeys
In this part we’re going to look at an example solution to implement matched geometry animations in our Journeys app.

1:39:17
LIVE STREAMS
Spaced Out
In this stream we’re going to build an app to help folks learn something, like a language or other important terminology. It’s flashcards, but with a twist: we’ll be using widgets, so they learn right from their Home Screen.

2:38
INTERVIEW QUESTIONS
Can you explain MVVM, and how it might be used on Apple's platforms?
As with so many good interview answers, you should aim to provide a succinct summary first, then expand on your answer with some specifics and examples, and finally get into more nuanced territory based on your real-world experiences.

2:09
INTERVIEW QUESTIONS
What is the purpose of NotificationCenter?
Apple’s NotificationCenter class implements the observer pattern from the Gang of Four book on design patterns, allowing any number of objects be notified when a specific event happens. But to answer this question well, you need to go beyond theory and focus on when it’s actually used.

13:00
SOLUTIONS
Cupcake Corner
This challenge asks you to upgrade the form validation, add a user-facing error, then make the app remember the user's delivery details using UserDefaults. Let’s tackle it now…
43:24
ULTIMATE PORTFOLIO APP
Creating a simple widget
UPDATED: Widgets allow users to place parts of our app right on their Home Screen, which is both deeply powerful and deeply personal. In this article we’re going to start by doing all the app configuration required to make widgets function, then add a simple widget for our app to show that everything works.
