Shipping a visionOS app for launch
The future of audio synthesis is in your hands!
We're now just a few days away from the launch of Apple Vision Pro, and like many other developers I've built and shipped a visionOS app ready for launch day.
Doing this took quite a few steps, so I wanted to walk you through the whole process: coming up with an idea, building a prototype, visiting Apple's Vision Pro labs, fixing problems, and more. Hopefully this is useful to anyone else who is thinking about shipping for visionOS!
- If you have an Apple Vision Pro, you can download the app here
- There's a press kit with screenshot, text, and an app preview video here

SPONSORED Take the pain out of configuring and testing your paywalls. RevenueCat's Paywalls allow you to remotely configure your entire paywall view without any code changes or app updates.
Sponsor Hacking with Swift and reach the world's largest Swift community!
About the app
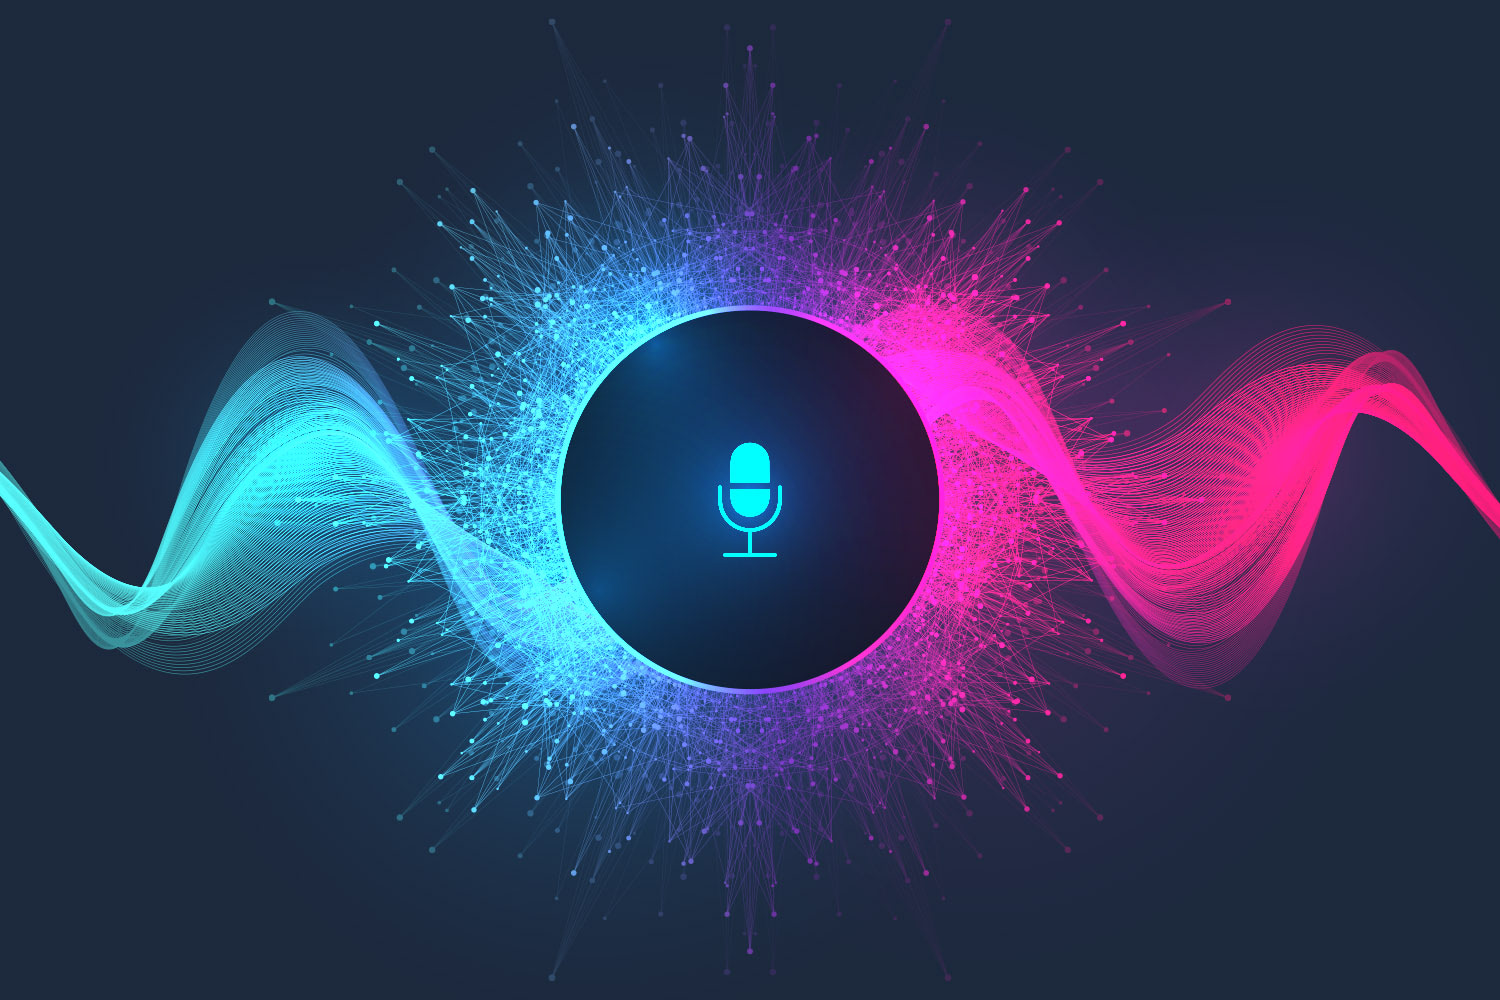
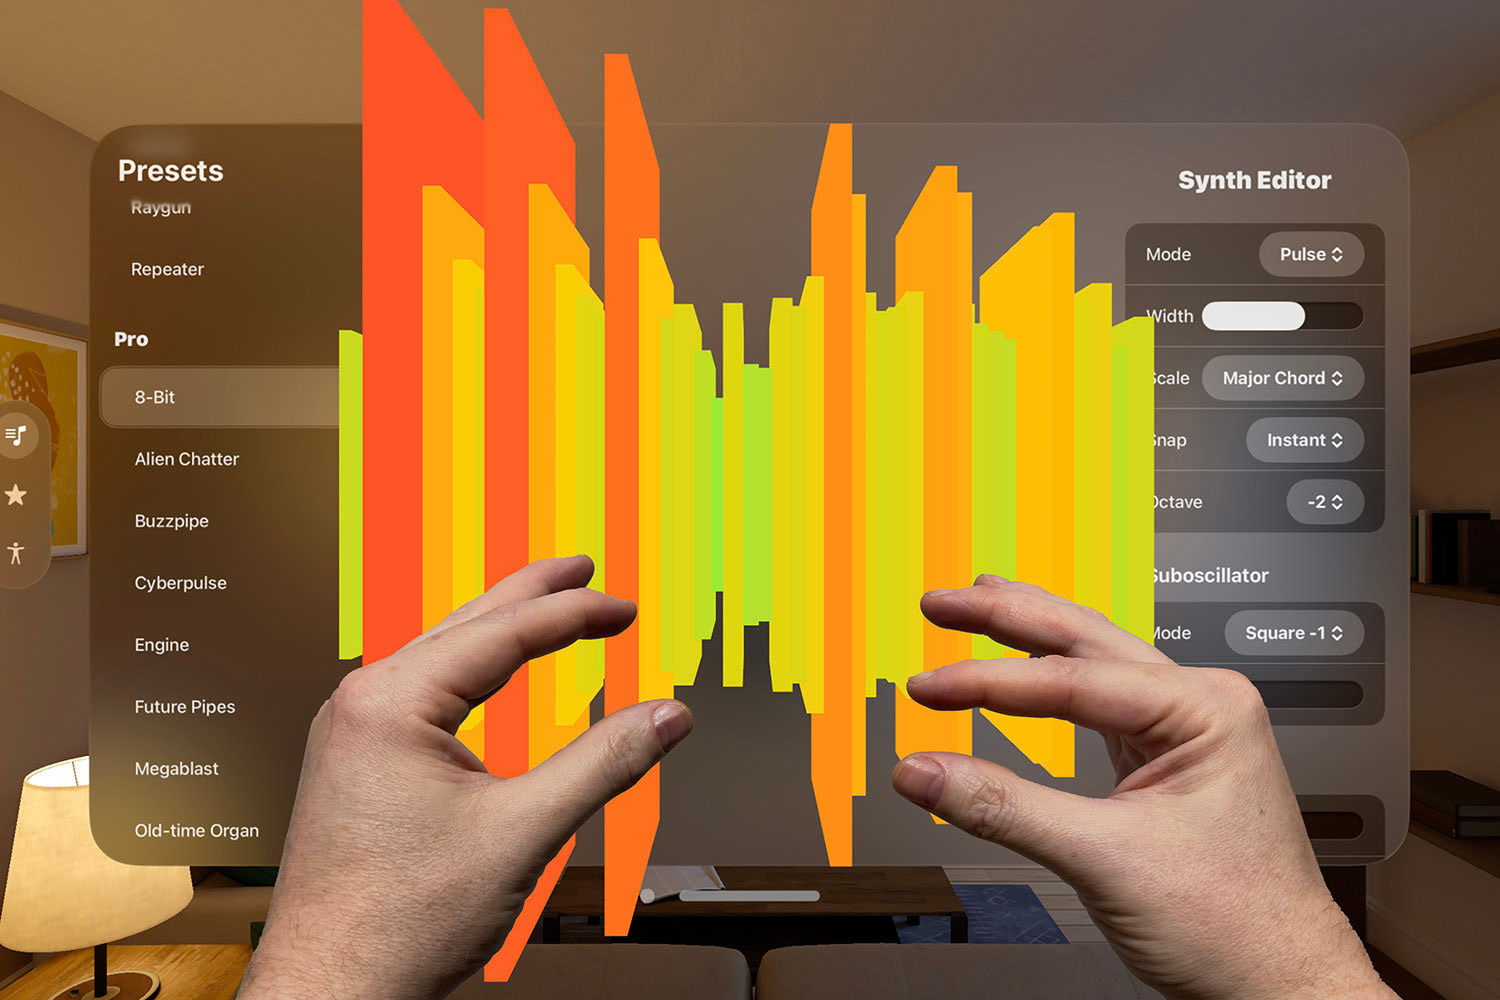
The app I built is called Spatial Symphony, and it's a synthesizer controlled by hand movements.
It was born out of a very simple idea to create a theremin for Apple Vision Pro – an instrument that in real life is created by moving your hands in the air, and so seemed perfectly suited to the new hand-tracking APIs that ship with visionOS.
The idea quickly expanded into a general-purpose synth, with controls for waveform, reverb, distortion, chorus, scale snapping, and more, and I ended up shipping 20 synth presets plus a full editor UI.
You can see the app running here:
What powers it all?
Beyond Swift and SwiftUI, Spatial Symphony was made possible by three frameworks.
The first framework is AudioKit, which drives all the synth work, providing all the effects and customizations. This was a massive revelation to me: there are countless thousands of people out there with a hundred times more knowledge about audio engineering than I have, but honestly AudioKit somehow manages to make me look like a pro.
The project – completely open-source, available under the MIT license – provides a wealth of audio power for us mere mortals to lean on, and does so with the most extraordinary performance. Every time I thought "I wonder if I could…?" the answer was always "AudioKit can do that, and do it absurdly well."
Honestly, using AudioKit feels like cheating, and I'm immensely grateful to the team for their work. I've been aware of AudioKit for some years but always imagined it was terrifically complex. It turns out nothing could be further from the truth – not only am I now sponsoring them on GitHub, but I'm also planning an AudioKit tutorial to help others get started.
The second framework is ARKit, which provides all the hand-tracking APIs that allow me to detect precise finger movements.
Earlier Apple APIs have offered hand tracking in a much more complex way, so I'm glad to see a huge rethink happened for visionOS. Sadly, it is only available for visionOS at this time, but I'm hopeful the new HandTrackingProvider will come to iOS in the future. (Apple folks: FB13318386)
One small hiccup is that there isn't a great deal of sample code available. Apple does demo it being used in the Happy Beam sample code, but it's quite intimidating there – literally the first thing I did was to write a trivial implementation of finger tracking that I could call easily elsewhere in my project.
As a result, my code to detect finger positions looks like this:
let distance = handTracker.calculateDistance(from: .left, .indexFingerTip, to: .right, .thumbTip)I'm hoping we get something similar in ARKit so that everyone gets this kind of easy code. (Apple folks: FB13318478)
The third external framework I leaned heavily on was RealityKit, which provides all the 3D parts of the app.
"3D parts"? Well, yeah: once I had the app working well, I decided to create a 3D waveform visualization, so your sound literally comes towards you as it gets louder – I really wanted to build an app that was only really possible on Vision Pro, so the 3D waveform and hand-tracking sit at the core of the experience.
It might sound silly, but having seen the finished product on a real Vision Pro I really loved the experience – the sound waves flow out towards you in 3D, even overlapping parts of the UI when your volume is high, and it's quite delightful.
What about SwiftUI?
Building visionOS apps with SwiftUI is an absolute dream. There's no clearer way I can say it: you get a really fantastic experience out of the box, with standard controls such as TabView, Toolbar, and NavigationStack adapting beautifully to the spatial environment.
I hit precisely zero performance problems, and zero SwiftUI bugs along the way – this thing has been polished to the most extraordinary level, and the SwiftUI for visionOS team deserve a round of applause for how slick the whole process is.
If you're keen to make your own SwiftUI apps work well on visionOS, here are three quick tips:
- Using
.background(.regularMaterial)and.foregroundStyle(.secondary)helps keep users present in their environment while helping your UI pop. - Using
ToolbarItemGroup(placement: .bottomOrnament)and similar helps position important controls outside your main window. - Using SF Symbols and Dynamic Type is more important than ever: SF Symbols scale beautifully even when the user gets up close to your window, and Apple's adjusted Dynamic Type weights and kerning help ensure your text is clear on the glass backgrounds.
I just finished a day-long workshop specifically on visionOS – if you're a Hacking with Swift+ subscriber you can rewatch it all for free.
Testing on a real device at Apple's Vision Pro Labs
I wanted to build an app that would only be possible on visionOS, which brought a rather significant drawback: I actually needed to test the thing on a real Vision Pro in order to be sure it worked.
Fortunately, Apple have been running a series of Vision Pro labs around the world, and I attended two of them. I'm limited in terms of what I can say here, but I believe the below is all safe!
- The labs were open to everyone – you just filled in a form online for whichever country you wanted to attend, and hopefully were granted a slot. They were running a ton of these labs pretty much back to back, so I feel fairly certain that everyone who wanted to attend had the chance.
- Everyone did have to sign an NDA to get into the labs. That means I can't share photos, I can't talk about who I met there, and I can't talk about the hardware or software. Still, now that there are public reviews out from the press, you can go and read them for full details!
- The labs gave you hands-on access to a Vision Pro device. I've had some folks on Twitter – people who have never gotten near a device – try to tell me that using the Vision Pro for more than 30 minutes is impossible, but that's clearly nonsense. Seriously, we were using the device intensively, and I had no problems.
- Getting extensive hands-on time with the device helped immensely. Yes, I could check that my finger-tracking code worked correctly, but I could also check that sound levels were correct, that the 3D effects weren't jarring, that all my UI was clearly legible, and more. I'm glad the visionOS simulator exists, but even if you have a huge display on your Mac it's still small compared to the window sizes on a real device.
- I really appreciate the work of all the Apple folks supporting the labs – they have put in a huge amount of effort to help elevate our work, and users will benefit greatly.
Even up to the week before launch the labs were full of developers working on last-minute fixes and improvements, and folks were genuinely buzzing about what they were working on.
From idea to prototype
Going from nothing to App Store takes a number of steps, but in this case I was able to divide the work into a number of stages.
Step 1: Can I get the hand-tracking to work? I wrote a whole bunch of speculative code that I figured ought to make hand-tracking work well, but I had to actually attend a lab to verify that.
It turned out that not only did my hand-tracking code work, it worked so well that I almost filed a bug report with Apple because Vision Pro was picking up hand gestures even when my hand was almost out of sight.
Initially the hand-tracking code simply showed how many centimeters one finger was from another, but it was enough – it proved the concept worked, so I could move on.
Step 2: Can I build a synth? This is where AudioKit came in, but because it didn't require a physical device I actually built this part as an iOS app. The app used screen touches to simulate hand gestures: vertical movement for volume, and horizontal movement for pitch.
This process allowed me huge scope to experiment: I could try literally any kind of audio idea that popped into my head, noodle around with it, and decide whether I liked the result or not.
At this early juncture the app was simply called "Playroom", and it was a bunch of sliders that controlled synth inputs, along with a big white space where I could detect touches to control the synth.
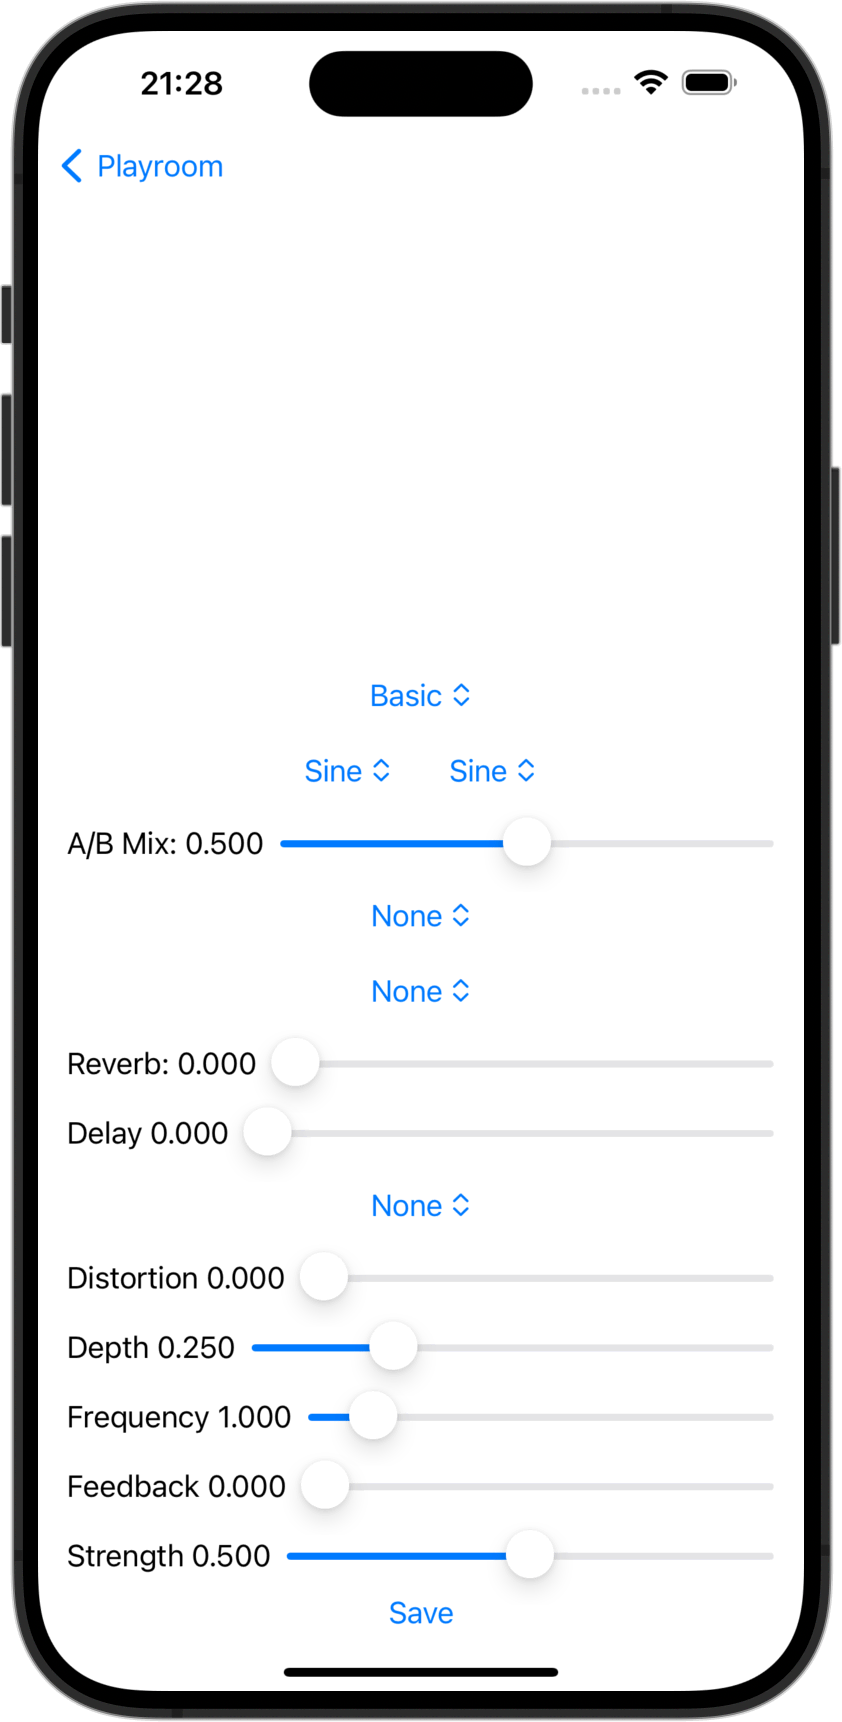
Obviously it was rudimentary at best, but again it proved the concept worked so I could move on.
Step 3: This is where the app took a tangent. I had shown that hand-tracking worked and that building a synth was entirely possible, but then I thought "why stop there?"
What if – rather than just being a synth – I could allow users to play the piano with their fingers? With eight fingers you'd get a complete C to C octave, and factoring in hand distance would allow going up or down octaves. Heck, piano was just one example of what I wanted: I tracked down and converted public domain recordings of an organ, a flute, a drum kit, a harp, a trumpet, and more, and brought them all into the app.
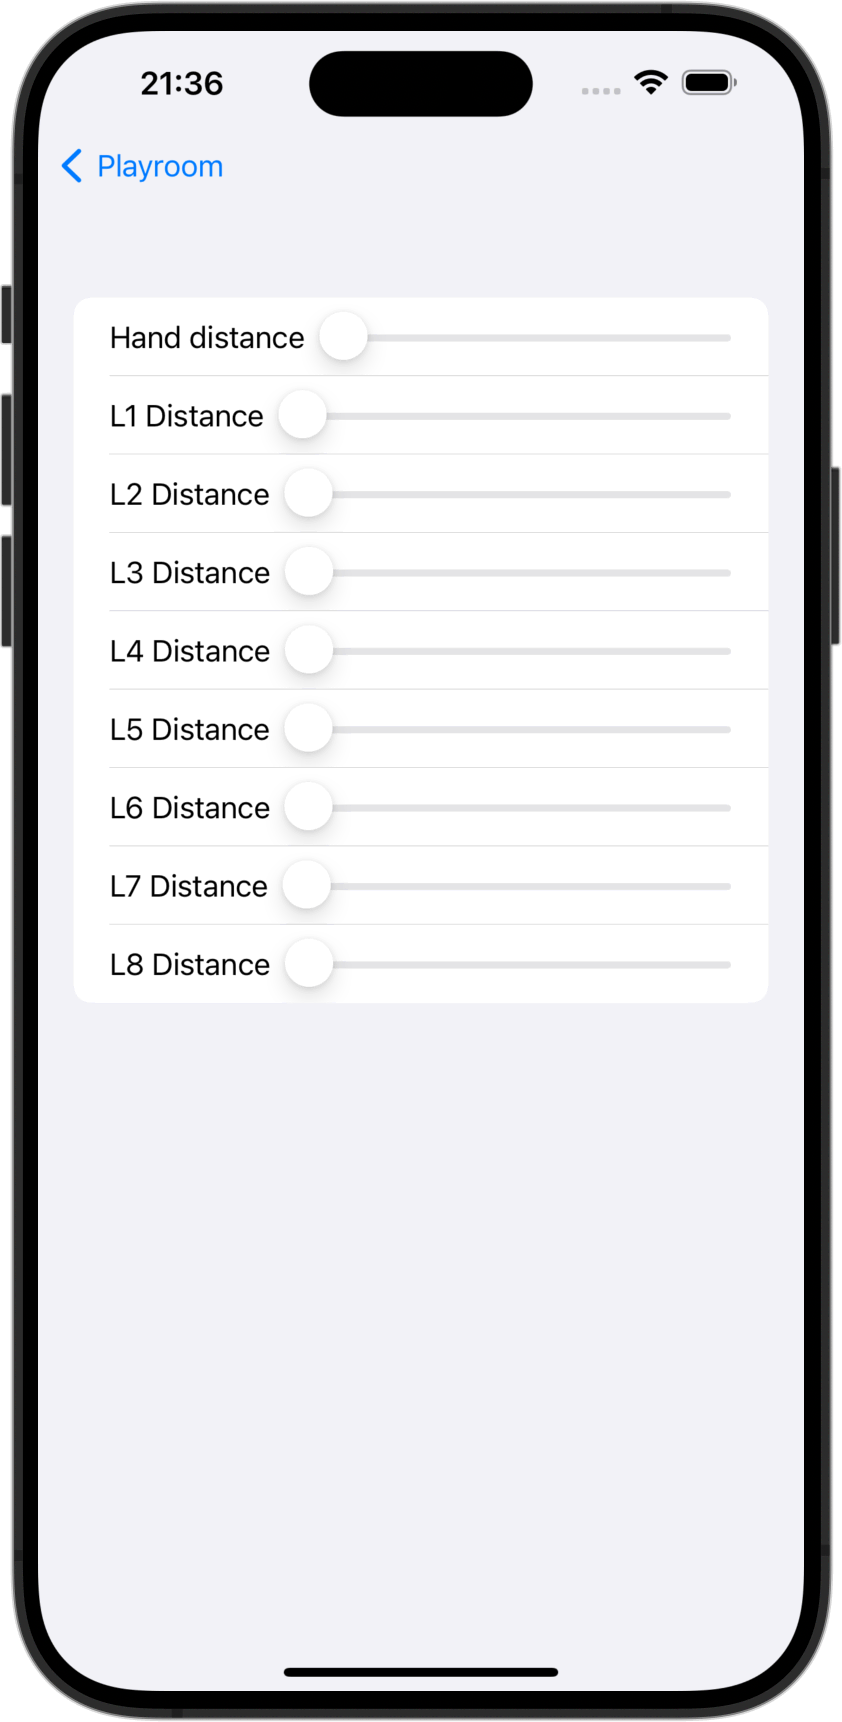
This was slightly trickier. Detecting when to start or stop a synth was simply a matter of deciding whether two fingers were within half a centimeter of each other, or thereabouts. On the other hand starting and stopping other instruments needed more control: all finger distances had to be tracked perfectly, and each sound needed to be triggered only once until the user had moved the respective finger far enough away from the touch point.
Again, I wrote a bunch of speculative code that tracked all the data I cared about, and wrote a trivial testing UI that simulated finger distances. You can see it below – the sound needed to trigger exactly once when each finger distance was below 0.1, but then not trigger again until that same finger had moved back above 0.2 to avoid rapid triggering of the sound.
I spent a lot of time finding, recording, editing, and processing instrument sounds, but when I got to my second Apple Vision Pro lab I just wasn't happy with the result – the concept was okay, but my implementation wasn't quite good enough to be enjoyable.
Trust me: I really wanted to be able to play drums on my fingers! But at about 2pm on my second lab day I had to make a call: I could spend the next few hours trying to fix the broken instrument code, or I could scrap that feature entirely and spend the remaining time polishing the (definitely working) synth code.
So, I chose to cut the instrument feature, and I have no regrets.
In my experience it is always better to have something simple that works well than something big that is average at best. And yeah, I do hope to bring back the instrument functionality as soon as I have my own Vision Pro to test with – all the code is there still, as are all my instrument recordings; I just need to get that polish in place so the experience feels good.
From prototype to shipping app
After the second lab I had a fairly finished product on my hands: the synth worked flawlessly, the hand-tracking was a delight, and I was happy with the UI.
But as the saying goes, "once you've finished the first 90%, you can start work on the second 90%." For this app that meant creating an app icon, writing App Store description text, taking screenshots, and more.
It also meant creating an app preview video, which presented a particular challenge for a Vision Pro app.
Given that the app relies heavily on hand input and I wasn't able to record on a real device, I did consider trying to record my hands against a green screen or a plain-colored wall then trying to composite them onto a regular screen recording. I quickly realized it really didn't matter – not only could I record a better app preview with hands once I had a real device, but whatever time I had would be much better spent adding features and polishing what I had.
So, after the lab I added a lot of extra polish, including:
- Lots of presets with interesting effects.
- A much improved chorus effect (I had been using a flanger previously, but chorus proved significantly better.)
- Adding an in-app purchase to unlock pro mode.
- Scale snapping, so that finger movements can optionally snap to specific notes in a scale rather than being freeform.
- One-synth mode vs two-synth mode, for beginners and experienced users.
Just as importantly, I did so in stages: as soon as I had something I was happy with – which for me really comes down "am I proud of this?" – I submitted it to App Review and got it approved. I then submitted a 1.0.1 update with small improvements, and a 1.1 update with further improvements, but it meant that if I hit problems I was always in a launch-ready state.
And now we wait
At this point there are still two days until Apple Vision Pro launches.
I got my pre-order in on time, and I'll be flying to New York tomorrow ready to collect my device from the flagship store on Fifth Avenue. My plan is to take it straight back to my hotel and get back to hacking on code straight away – I have had so much fun building for this thing, and I want to get back to it!
Do I want to reinstate the missing instruments feature in Spatial Symphony? Yes! Do I have other apps I want to ship? You bet! But I'm also hugely excited to try out apps from all the other developers who have been working so hard ahead of the big day.
I know in terms of hardware the Vision Pro is already something special, but from a developer's perspective it's the software that is most exciting – Apple's huge, powerful, and mature spread of APIs mean we've already seen an absolute explosion of new software for this platform even before it's released, but I think as more folks get to try it for themselves they'll say exactly the same thing I said when I first tried it at WWDC23: "I need to build an app for this."
If you have an Apple Vision Pro, you can download the app here – let me know what you think!
SPONSORED Take the pain out of configuring and testing your paywalls. RevenueCat's Paywalls allow you to remotely configure your entire paywall view without any code changes or app updates.
Sponsor Hacking with Swift and reach the world's largest Swift community!