Adding in players: GKGameModelPlayer
It's time to take our first step into GameplayKit, although at first this step will be small. Right now our game is single-player, and all chips that get dropped are red chips. We're going to upgrade this so that there are two players by creating a new Player class that stores a player's chip type, their name, their color, and a special GameplayKit value called playerId – this is just a number that identifies every player uniquely.
On top of that, we're also going to create a static property for players, which means it's a property that belongs to the class and thus can be called from anywhere. This will be an allPlayers array holding both Player objects for easy reference
So, please create a new Cocoa Touch Class in your project. Name it “Player”, then make it inherit from NSObject. Let's go ahead and create the properties up front. As a reminder, we need:
- The chip color of the player, either
.red,.black, or.none. - The drawing color the player, set to a
UIColor. - The name of the player, which will be either "Red" or "Black".
- A GameplayKit
playerIdproperty, which we'll just set to the raw value of their chip type. (We set this enum up as an integer, remember?) - A static array of two players, red and black.
Add these properties now:
var chip: ChipColor
var color: UIColor
var name: String
var playerId: Int

static var allPlayers = [Player(chip: .red), Player(chip: .black)]
Now for what is going to be a huge anti-climax: let's bring in GameplayKit by adding this import:
import GameplayKitNow make your Player class conform to the GKGameModelPlayer protocol, like this:
class Player: NSObject, GKGameModelPlayer {Xcode will be flagging up errors all over your code, but none of them are a result of GameplayKit – in fact, those two changes are all it takes to make GameplayKit work with our player data. Instead, the errors are because we've declared four properties non-optional and haven't given them any values, so we need to create a custom initializer.
This initializer will accept one parameter, which is the chip color to use for each player. From that we can set the player ID (as the raw value of the chip type enum), the color (either red or black UIColor), and the player name (either "Red" or "Black"). It's pretty straightforward really – here's the code:
init(chip: ChipColor) {
    self.chip = chip
    self.playerId = chip.rawValue

    if chip == .red {
        color = .red
        name = "Red"
    } else {
        color = .black
        name = "Black"
    }

    super.init()
}
We're going to add one more thing to this class before we're done, which is a small computed property that returns the opponent for a specific player. If the player is red, it returns the black player from the allPlayers array, and if the player is black, it returns the red player. Here's the code:
var opponent: Player {
    if chip == .red {
        return Player.allPlayers[1]
    } else {
        return Player.allPlayers[0]
    }
}
That's the Player class finished: we won't be adding any more to it in this project. But after that code, nothing has really changed because we're not actually using those players.
To take the next step in our game, we're going to start using the new Player class so that we have two players in the game, and we're also going to update the user interface to mark whose turn it is.
Updating the user interface requires two methods in the Board class: one to determine if the board is full of pieces, and one to determine if a particular player has won. With these two we can show either "Red/Black Wins!" or "Draw!" in the user interface, but for now we're just going to return false from these methods – we'll put the real code in later.
Put these two into your Board class:
func isFull() -> Bool {
    return false
}

func isWin(for player: Player) -> Bool {
    return false
}
Now onto the real work: we're going to create two new methods called continueGame() and updateUI(), both in the ViewController class. The first will get called after every move, and will end the game with an alert if needed, otherwise it will switch players. The second is responsible for updating the title of the view controller to show whose turn it is, although later on we'll also be making it kick off AI work.
The code in updateUI() is trivial, so let's get it out of the way. Open ViewController.swift and add this method:
func updateUI() {
    title = "\(board.currentPlayer.name)'s Turn"
}
We aren't tracking the current player just yet so you'll get an error at first, but we'll fix it in a moment.
The continueGame() method is longer, but isn't really very complicated. To help you along I'll break it down into numbered steps in the code:
- We create a
gameOverTitleoptional string set to nil. - If the game is over or the board is full,
gameOverTitleis updated to include the relevant status message. - If
gameOverTitleis not nil (i.e., the game is won or drawn), show an alert controller that resets the board when dismissed. - Otherwise, change the current player of the game, then call
updateUI()to set the navigation bar title.
Here's the code, with the number comments matching the list above:
func continueGame() {
    // 1
    var gameOverTitle: String? = nil

    // 2
    if board.isWin(for: board.currentPlayer) {
        gameOverTitle = "\(board.currentPlayer.name) Wins!"
    } else if board.isFull() {
        gameOverTitle = "Draw!"
    }

    // 3
    if gameOverTitle != nil {
        let alert = UIAlertController(title: gameOverTitle, message: nil, preferredStyle: .alert)
        let alertAction = UIAlertAction(title: "Play Again", style: .default) { [unowned self] (action) in
            self.resetBoard()
        }

        alert.addAction(alertAction)
        present(alert, animated: true)

        return
    }

    // 4
    board.currentPlayer = board.currentPlayer.opponent
    updateUI()
}
The final steps are actually pretty straightforward. First we need to create the currentPlayer property in the Board class so that it silences the Xcode errors:
var currentPlayer: PlayerThat's a non-optional value, so by fixing the previous errors we introduce a new one: currentPlayer must be given a value inside the board's initializer. Add this at the start of the init() method in Board.swift:
currentPlayer = Player.allPlayers[0]We're almost done with this chapter, and in fact we need only make a couple more changes for our game to work with two players. First, we need to update the makeMove() method so that it drops in chips of the correct color rather than always using red. This is easy now that we have the board.currentPlayer property:
@IBAction func makeMove(_ sender: UIButton) {
    let column = sender.tag

    if let row = board.nextEmptySlot(in: column) {
        board.add(chip: board.currentPlayer.chip, in: column)
        addChip(inColumn: column, row: row, color: board.currentPlayer.color)
        continueGame()
    }
}
Note that I snuck in a call to continueGame() so that control automatically flips between players after each move.
Finally, we need to set the initial view controller title when the game is started or reset, which means modifying the resetBoard() method so that it calls updateUI(). Modify the start of the method to this:
func resetBoard() {
board = Board()
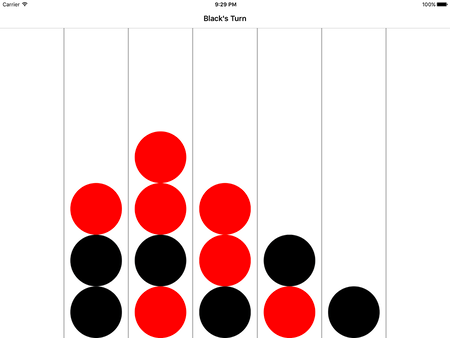
updateUI()If you run your app now, you'll see things are starting to come together: you can tap on a column to play a chip, then control hands over to the other player and the user interface updates. The game doesn't end, though, because it has no idea whether one player has made four in a row, or whether it's a draw. Let's tackle that now…

SPONSORED Join a FREE crash course for mid/senior iOS devs who want to achieve an expert level of technical and practical skills – it’s the fast track to being a complete senior developer! Hurry up because it'll be available only until April 28th.
Sponsor Hacking with Swift and reach the world's largest Swift community!


