UICollectionView data sources
We’ve now modified the user interface so that it considers ViewController to be a collection view controller, but we haven’t implemented any of the data source methods to make that work. This works just like table views, so we get questions like “how many items are there?” and “what’s in item number 1?” that we need to provide sensible answers for.
To begin with, let's put together the most basic implementation that allows our app to work. Normally this would be straightforward, but here we have a small complication: when we call dequeueReusableCell(withReuseIdentifier:for:) we’ll be sent back a regular UICollectionViewCell rather than our custom PersonCell type.
We can fix that we’ll add a conditional typecast, but that adds a second problem: what do we do if our typecast fails? That is, what if we expected to get a PersonCell but actually got back a regular UICollectionViewCell instead? If this happens it means something is fundamentally broken in our app – we screwed up in the storyboard, probably. As a result, we need to get out immediately; there’s no point trying to make our app limp onwards when something is really broken.
So, we’re going to be using a new function called fatalError(). When called this will unconditionally make your app crash – it will die immediately, and print out any message you provide to it. That might sound awful, but:
- You should only call this when things really are bad and you don’t want to continue – it’s really only a sense check to make sure everything is as we expect.
- Swift knows that
fatalError()always causes a crash, so we can use it to escape from a method that has a return value without sending anything back. This makes it really convenient to use in places like our current scenario.
It’s best if you see fatalError() in some real code, so add these two methods now:
override func collectionView(_ collectionView: UICollectionView, numberOfItemsInSection section: Int) -> Int {
    return 10
}

override func collectionView(_ collectionView: UICollectionView, cellForItemAt indexPath: IndexPath) -> UICollectionViewCell {
    guard let cell = collectionView.dequeueReusableCell(withReuseIdentifier: "Person", for: indexPath) as? PersonCell else {
        // we failed to get a PersonCell – bail out!
        fatalError("Unable to dequeue PersonCell.")
    }

    // if we're still here it means we got a PersonCell, so we can return it
    return cell
}
We haven't looked at any of this code before, so I want to pull it apart in detail before continuing:
collectionView(_:numberOfItemsInSection:)This must return an integer, and tells the collection view how many items you want to show in its grid. I've returned 10 from this method, but soon we'll switch to using an array.collectionView(_:cellForItemAt:)This must return an object of typeUICollectionViewCell. We already designed a prototype in Interface Builder, and configured thePersonCellclass for it, so we need to create and return one of these.dequeueReusableCell(withReuseIdentifier:for:)This creates a collection view cell using the reuse identified we specified, in this case "Person" because that was what we typed into Interface Builder earlier. But just like table views, this method will automatically try to reuse collection view cells, so as soon as a cell scrolls out of view it can be recycled so that we don't have to keep creating new ones.
Note that we need to typecast our collection view cell as a PersonCell because we'll soon want to access its imageView and name outlets.
These two new methods both come from collection views, but I think you’ll find them both remarkably similar to the table view methods we’ve been using so far – you can go back and open project 1 again to see just how similar!
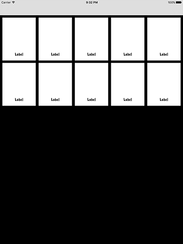
Press Cmd+R to run your project now, and you'll see the beginning of things start to come together: the prototype cell you designed in Interface Builder will appear 10 times, and you can scroll up and down to view them all. As you'll see, you can fit two cells across the screen, which is what makes the collection view different to the table view. Plus, if you rotate to landscape you'll see it automatically (and beautifully) animates the movement of cells so they take up the full width.

SPONSORED Join a FREE crash course for mid/senior iOS devs who want to achieve an expert level of technical and practical skills – it’s the fast track to being a complete senior developer! Hurry up because it'll be available only until April 28th.
Sponsor Hacking with Swift and reach the world's largest Swift community!


