Classes
Swift has another way of building complex data types called classes. They look similar to structs, but have a number of important differences, including:
- You don't get an automatic memberwise initializer for your classes; you need to write your own.
- You can define a class as being based off another class, adding any new things you want.
- When you create an instance of a class it’s called an object. If you copy that object, both copies point at the same data by default – change one, and the copy changes too.
All three of those are massive differences, so I'm going to cover them in more depth before continuing.
Initializing an object
If we were to convert our Person struct into a Person class, Swift wouldn't let us write this:
class Person {
    var clothes: String
    var shoes: String
}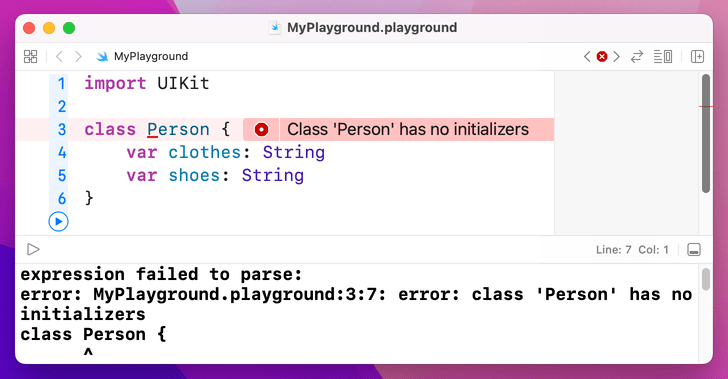
This is because we're declaring the two properties to be String, which if you remember means they absolutely must have a value. This was fine in a struct because Swift automatically produces a memberwise initializer for us that forced us to provide values for the two properties, but this doesn't happen with classes so Swift can't be sure they will be given values.
There are three solutions: make the two values optional strings, give them default values, or write our own initializer. The first option is clumsy because it introduces optionals all over our code where they don't need to be. The second option works, but it's a bit wasteful unless those default values will actually be used. That leaves the third option, and really it's the right one: write our own initializer.
To do this, create a method inside the class called init() that takes the two parameters we care about:
class Person {
    var clothes: String
    var shoes: String

    init(clothes: String, shoes: String) {
        self.clothes = clothes
        self.shoes = shoes
    }
}
There are two things that might jump out at you in that code.
First, you don't write func before your init() method, because it's special. Second, because the parameter names being passed in are the same as the names of the properties we want to assign, you use self. to make your meaning clear – "the clothes property of this object should be set to the clothes parameter that was passed in." You can give them unique names if you want – it's down to you.
Important: Swift requires that all non-optional properties have a value by the end of the initializer, or by the time the initializer calls any other method – whichever comes first.
Class inheritance
The second difference between classes and structs are that classes can build on each other to produce greater things, known as class inheritance. This is a technique used extensively in both UIKit and AppKit, even in the most basic programs, so it's something you will need to get to grips with eventually.
Let's start with something simple: a Singer class that has properties, which is their name and age. As for methods, there will be a simple initializer to handle setting the properties, plus a sing() method that outputs some words:
class Singer {
    var name: String
    var age: Int

    init(name: String, age: Int) {
        self.name = name
        self.age = age
    }

    func sing() {
        print("La la la la")
    }
}
We can now create an instance of that object by calling that initializer, then read out its properties and call its method:
var taylor = Singer(name: "Taylor", age: 25)
taylor.name
taylor.age
taylor.sing()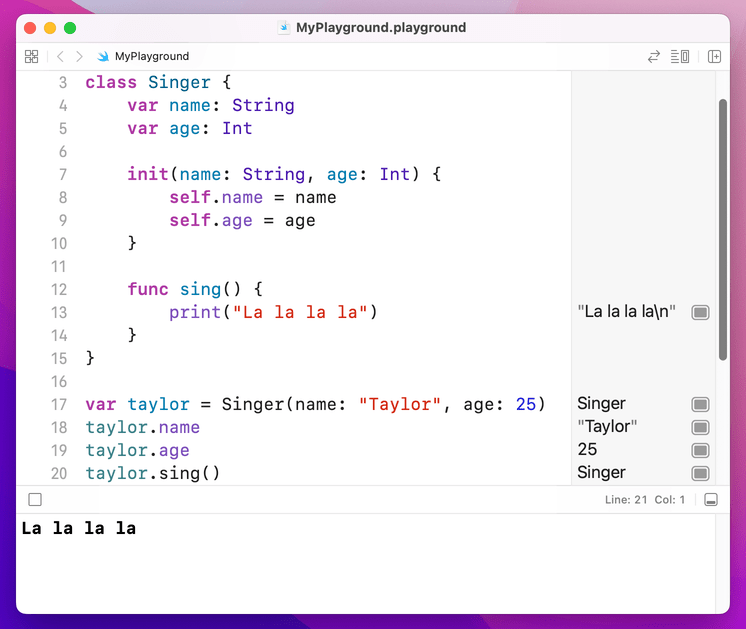
That's our basic class, but we're going to build on it: I want to define a CountrySinger class that has everything the Singer class does, but when I call sing() on it I want to print "Trucks, guitars, and liquor" instead.
You could of course just copy and paste the original Singer into a new class called CountrySinger but that's a lazy way to program and it will come back to haunt you if you make later changes to Singer and forget to copy them across. Instead, Swift has a smarter solution: we can define CountrySinger as being based off Singer and it will get all its properties and methods for us to build on:
class CountrySinger: Singer {

}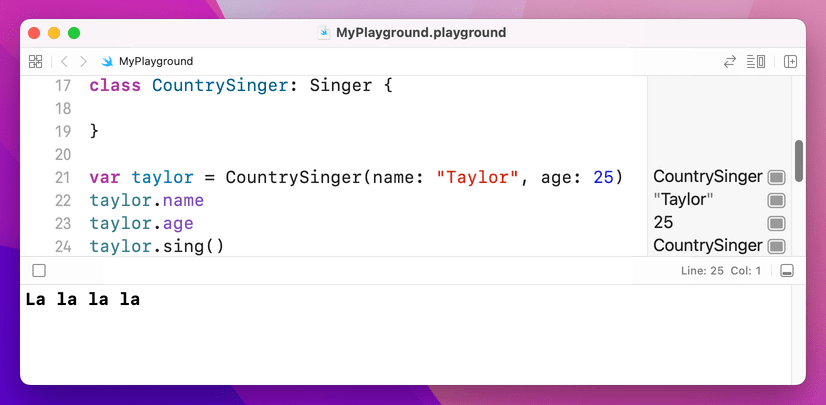
That colon is what does the magic: it means "CountrySinger extends Singer." Now, that new CountrySinger class (called a subclass) doesn't add anything to Singer (called the parent class, or superclass) yet. We want it to have its own sing() method, but in Swift you need to learn a new keyword: override. This means "I know this method was implemented by my parent class, but I want to change it for this subclass."
Having the override keyword is helpful, because it makes your intent clear. It also allows Swift to check your code: if you don't use override Swift won't let you change a method you got from your superclass, or if you use override and there wasn't anything to override, Swift will point out your error.
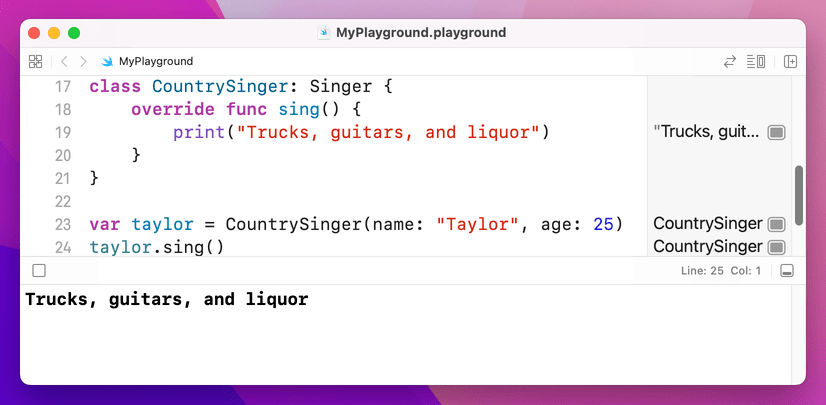
So, we need to use override func, like this:
class CountrySinger: Singer {
    override func sing() {
        print("Trucks, guitars, and liquor")
    }
}
Now modify the way the taylor object is created:
var taylor = CountrySinger(name: "Taylor", age: 25)
taylor.sing()
If you change CountrySinger to just Singer you should be able to see the different messages appearing in the results pane.
Now, to make things more complicated, we're going to define a new class called HeavyMetalSinger. But this time we're going to store a new property called noiseLevel defining how loud this particular heavy metal singer likes to scream down their microphone.
This causes a problem, and it's one that needs to be solved in a very particular way:
- Swift wants all non-optional properties to have a value.
- Our
Singerclass doesn't have anoiseLevelproperty. - So, we need to create a custom initializer for
HeavyMetalSingerthat accepts a noise level. - That new initializer also needs to know the
nameandageof the heavy metal singer, so it can pass it onto the superclassSinger. - Passing on data to the superclass is done through a method call, and you can't make method calls in initializers until you have given all your properties values.
- So, we need to set our own property first (
noiseLevel) then pass on the other parameters for the superclass to use.
That might sound awfully complicated, but in code it's straightforward. Here's the HeavyMetalSinger class, complete with its own sing() method:
class HeavyMetalSinger: Singer {
    var noiseLevel: Int

    init(name: String, age: Int, noiseLevel: Int) {
        self.noiseLevel = noiseLevel
        super.init(name: name, age: age)
    }

    override func sing() {
        print("Grrrrr rargh rargh rarrrrgh!")
    }
}
Notice how its initializer takes three parameters, then calls super.init() to pass name and age on to the Singer superclass - but only after its own property has been set. You'll see super used a lot when working with objects, and it just means "call a method on the class I inherited from.” It's usually used to mean "let my parent class do everything it needs to do first, then I'll do my extra bits."
Class inheritance is a big topic so don't fret if it's not clear just yet. However, there is one more thing you need to know: class inheritance often spans many levels. For example, A could inherit from B, and B could inherit from C, and C could inherit from D, and so on. This lets you build functionality and re-use up over a number of classes, helping to keep your code modular and easy to understand.
Working with Objective-C code
If you want to have some part of Apple’s operating system call your Swift class’s method, you need to mark it with a special attribute: @objc. This is short for “Objective-C”, and the attribute effectively marks the method as being available for older Objective-C code to run – which is almost all of iOS, macOS, watchOS, and tvOS. For example, if you ask the system to call your method after one second has passed, you’ll need to mark it with @objc.
Don’t worry too much about @objc for now – not only will I be explaining it in context later on, but Xcode will always tell you when it’s needed. Alternatively, if you don’t want to use @objc for individual methods you can put @objcMembers before your class to automatically make all its methods available to Objective-C.
Values vs References
When you copy a struct, the whole thing is duplicated, including all its values. This means that changing one copy of a struct doesn't change the other copies – they are all individual. With classes, each copy of an object points at the same original object, so if you change one they all change. Swift calls structs "value types" because they just point at a value, and classes "reference types" because objects are just shared references to the real value.
This is an important difference, and it means the choice between structs and classes is an important one:
- If you want to have one shared state that gets passed around and modified in place, you're looking for classes. You can pass them into functions or store them in arrays, modify them in there, and have that change reflected in the rest of your program.
- If you want to avoid shared state where one copy can't affect all the others, you're looking for structs. You can pass them into functions or store them in arrays, modify them in there, and they won't change wherever else they are referenced.
If I were to summarize this key difference between structs and classes, I'd say this: classes offer more flexibility, whereas structs offer more safety. In practice, which you choose depends on the Apple framework you’re working with: UIKit, AppKit, SpriteKit and the other older frameworks rely heavily on structs for data and classes for user interface elements, whereas SwiftUI flips things around and uses structs for user interface elements and classes for data.
BUILD THE ULTIMATE PORTFOLIO APP Most Swift tutorials help you solve one specific problem, but in my Ultimate Portfolio App series I show you how to get all the best practices into a single app: architecture, testing, performance, accessibility, localization, project organization, and so much more, all while building a SwiftUI app that works on iOS, macOS and watchOS.
Sponsor Hacking with Swift and reach the world's largest Swift community!


