Creating a WaveView to draw smooth waveforms
In this article I’m going to walk you through building a WaveView with SwiftUI, allowing us to create beautiful waveform-like effects to bring your user interface to life.
Watch the video here, or read the article below
Creating a wave effect is a simple, beautiful effect that can really bring your UI to life. In its simplest form you might use it a a continuous activity indicator for when your app is working on a task but you don’t know how long it will take, but if you layer several of them in various colors and opacities then you can create water-like effects and more.
Advance warning: there’ll be a small amount of mathematics involved to calculate our waveform, but I’ll break it down into simple steps.
To follow along, please create a new iOS project for SwiftUI, using the Single View App template.
Quick links
- Creating a simple wave
- Animating the wave
- Adding a parabolic curve
- Just for fun: multiple waves
- Challenges
Creating a simple wave
To get started, we’re going to create a Wave struct that conforms to the Shape protocol. This will have two Double properties: how high our waves should be, and how frequent our waves should be.
So, start with this new SwiftUI view:
struct Wave: Shape {
    // how high our waves should be
    var strength: Double

    // how frequent our waves should be
    var frequency: Double
}
To begin with, we’re going to create a simple, fixed sine wave. The core of this calculation is fairly simple, and starts by dividing up our available space based on the wave frequency so that we know the size of our wavelength – how big each rise and fall should be.
Once we have that, we count from 0 to the width of our full space and do the following:
- Find our current position relative to the size of our wavelength.
- Put that through the
sin()function to get a value between -1 and 1. - Multiply that by the
strengthproperty so our waves are made as big as requested. - Center the point vertically.
- Add that point to a path.
All that needs to be done in the path(in:) for our WaveView. Here it is in Swift, with lots of comments added explaining each line:
func path(in rect: CGRect) -> Path {
    let path = UIBezierPath()

    // calculate some important values up front
    let width = Double(rect.width)
    let height = Double(rect.height)
    let midWidth = width / 2
    let midHeight = height / 2

    // split our total width up based on the frequency
    let wavelength = width / frequency

    // start at the left center
    path.move(to: CGPoint(x: 0, y: midHeight))

    // now count across individual horizontal points one by one
    for x in stride(from: 0, through: width, by: 1) {
        // find our current position relative to the wavelength
        let relativeX = x / wavelength

        // calculate the sine of that position
        let sine = sin(relativeX)

        // multiply that sine by our strength to determine final offset, then move it down to the middle of our view
        let y = strength * sine + midHeight

        // add a line to here
        path.addLine(to: CGPoint(x: x, y: y))
    }

    return Path(path.cgPath)
}
Note: You’ll get a warning that midWidth isn’t used. That’s OK, because we’ll be using it later.
Like I said, we’re going to improve on that soon, but first let’s use it in ContentView so you can see it in action:
struct ContentView: View {
    var body: some View {
        ZStack {
            Wave(strength: 50, frequency: 30)
                .stroke(Color.white, lineWidth: 5)
        }
        .background(Color.blue)
        .edgesIgnoringSafeArea(.all)
    }
}
Simple, but nice!
Tip: We’re using stride(from: 0, through: width, by: 1) to add one point to our Bezier path for every X position in our width, but if you found that was slow you could do every tenth point like this:
stride(from: 0, through: width + 10, by: 10)If you look closely you’ll notice the line isn’t quite so smooth any more – try even higher values to see the line get increasingly jagged. Adding to width stops the line ending before it reaches the end.
Animating the wave
Our WaveView has properties to control its strength (or amplitude) and its frequency, but we can add a third to control its phase – a horizontal offset that lets us move the line either by hand or using animation.
Start by adding this property to WaveView:
// how much to offset our waves horizontally
var phase: Double
Now we can factor that into our call to sin() so that our position in the wave changes depending on phase:
let sine = sin(relativeX + phase)Make sure and change the way we create WaveView in ContentView, to send in a phase value:
Wave(strength: 50, frequency: 30, phase: 0)You can now try changing phase: 0 to a different value – try 10, 101, or whatever you want, and you should see the wave move along.
It’s good to have this control, but it’s even better to make it animate – to have our waveform move smooth across the screen. This takes a little work in SwiftUI, because we need to tell it what our animation actually does.
First, we need to define some state in ContentView that will store the current wave phase:
@State private var phase = 0.0Second, we can pass that into the WaveView initializer, so we can control the phase over time:
Wave(strength: 50, frequency: 30, phase: phase)And third, we can ask SwiftUI to animate phase to Double.pi * 2 when the ZStack is shown, by putting this modifier after edgesIgnoringSafeArea():
.onAppear {
    withAnimation(Animation.linear(duration: 1).repeatForever(autoreverses: false)) {
        self.phase = .pi * 2
    }
}
Tip: Using .pi * 2 here ensures our sine wave covers the full range of 0 to 1 then back to 0, so our animation loops flawlessly.
All that code is correct, and all that code is needed, but it won’t actually do anything – if you run the app you’ll see the waveform is still static.
The problem here is that SwiftUI doesn’t understand how to animate a waveform – it doesn’t know what that really means. It does know how to animate numbers, which means it can count from 1 through 10 for us over a period of time, so our job is to help it bridge that knowledge so it can animate our waveform.
Yes, we’re using withAnimation() to make our change, but that doesn’t do quite what you might think. Behind the scenes, SwiftUI will automatically update the phase property in ContentView to its new value, but then it will start interpolating from the old phase to the new phase and ask our waveform what we want to do with it.
We can update WaveView to receive that data by adding a new property called animatableData, which should be the same type as whatever we’re changing. This is computed: in the getter we’ll just send back phase, but in the setter we’ll set phase to be whatever is the new value that was passed in.
Add this property to WaveView now:
// allow SwiftUI to animate the wave phase
var animatableData: Double {
    get { phase }
    set { self.phase = newValue }
}
And now our animation will work – all the rest of it was fine, but now our WaveView is receiving the animation data from SwiftUI.
Adding a parabolic curve
The waveform looks okay, but we can do so much better with just a little mathematics by implementing a parabola, which is a curve that is U-shaped. This will make our waveform centered vertically on the left and right edges, but really wavy in the center – a bit like how Siri’s waves look.
I’ve made the calculations here as simple as possible, and I think you’ll agree the result looks significantly better – even if you’re not fond of math I hope you’ll give it a try!
Rather than dump the entire calculation on you at once, let’s build it up bit by bit.
Inside path(in:) we already have constants for width, height, midWidth, and midHeight. We need to add one more there, which will track 1 divided by midWidth.
Remember our loop counts over the width of the available space, adding to the Bezier path point by point. To make a parabola – a U-shape curve, we need to know how far we are to the horizontal mid-point, and that’s where our new property comes in.
First, add this below the previous four:
let oneOverMidWidth = 1 / midWidthNow inside our loop we can calculate how far we currently are from the middle of our width, and multiply that by oneOverMidWidth. This will tell us how far we are from the horizontal center of our space, measured in the range -1 to 1.
Add this below let relativeX:
// find how far we are from the horizontal center
let distanceFromMidWidth = x - midWidth

// bring that into the range of -1 to 1
let normalDistance = oneOverMidWidth * distanceFromMidWidth
Tip: I’ve used the name normalDistance there because bringing all possible values into the range of -1 to 1 is called normalization.
Next, I want to factor that value into our drawing. We’re going to start off with something simple so you can understand what’s happening more clearly.
Right now we calculate our Y position like this:
let y = strength * sine + midHeightWe need to add another number to that to make our parabolic curve – our U-shaped curve.
To start with, we’re just going to use the normalDistance value we calculated a moment ago, without modifying it at all. So, make this constant after normalDistance:
let parabola = normalDistanceWe’re going to make that more interesting in a moment, but it’s fine for now.
We can then factor that into our Y calculation like this:
let y = parabola * strength * sine + midHeightI encourage you to run the app now so you can understand the next part more clearly. Our previous code generating a smooth, regular sine wave, but now our wave height changes: it’s big on the left and right edges, and small in the center.
You’re seeing our parabola in action – the U shape it generates is being applied so our wave height.
If you want to understand why this happens, launch the Grapher program that comes with macOS. (Yes, you have it installed – every Mac has it installed, it’s just that most people don’t know it’s there.) When it launches, select the default 2D graph.
If you want to see a parabolic curve in action, type this: y=2x^2. The “y=“ part should be there already, and typing the ^ part allows us to make the squared symbol. When you press return, Grapher will draw the curve and you’ll see what I mean about a U shape – the curve is shallow in the center, but is increasingly steep on the left and right edges.
So, those values are being multiplied into our wave height. normalDistance is a value between -1 and 1, so on the left edge we multiple the wave height by -1 and on the right edge by 1, but in the dead center we multiply by 0 so there’s no height at all.
Here, though, I want the opposite effect: I want big waves in the middle and nothing on the edges. To do that, we need to calculate our parabola as follows:
let parabola = -(normalDistance * normalDistance) + 1Let’s break that down. First, normalDistance is a value in the range -1 to 1, so if we multiply that by itself we’ll up with a range with 1 on both sides with 0 in the middle.
For example:
- If
normalDistancewere -1, then we’d be doing -1 x -1, which is 1. - If
normalDistancewere 1, then we’d be doing 1 x 1, which is also 1. - But for smaller values, such as 0, we’d be doing 0 x 0, which is 0.
So, now we have a values in the range 1...0...1, which is our U shape. Next we negate that using -(normalDistance * normalDistance), which means we now have values in the range -1...0...-1. And finally, we add 1 to it, to make values in the range of 0...1...0 – big waves in the middle, and no waves on the edges.
And that’s it! Run the app again to see our finished effect – I think it looks a lot more dynamic than the simple sine wave, and as you’ve seen we can modify our curve in all sorts of interesting ways.
Just for fun: multiple waves
We’ve created one wave, but we can use a ZStack to layer multiple offset waves if we want, applying a little transparency to the stroke to create a fading effect.
Try this and see what you think:
ForEach(0..<10) { i in
    Wave(strength: 50, frequency: 10, phase: self.phase)
        .stroke(Color.white.opacity(Double(i) / 10), lineWidth: 5)
        .offset(y: CGFloat(i) * 10)
}
Notice that I’ve taken the frequency down to 10, which I think looks better.
Run the app and see what you think – we’re done!
Challenges
There is so much scope to expand this project, even if only by experimenting with the various values we have available to us.
As well as experimenting, there are two things in particular I’d like you to try:
- Remove the offset from our overlapping waves so they directly overlap, then try changing their phase and color to see if you can get a variety of overlapping waves at different states.
- Apply a mask to the
ForEachso that the center area is fully opaque but the left and right edges fade away to be invisible.
You can accomplish the first one with experimentation, but if you’re stuck on the second one try using a mask() modifier with a LinearGradient that uses clear/white/clear colors. I’ll post some example code below in case you get stuck, but I do recommend you try it yourself first!
Still here?
I’m going to assume that means you want to see a solution for the second challenge.
I’m just writing this so you can’t see my code by accident.
Seriously, this is your last chance before my code.
Okay, here we go:
ForEach(0..<10) { i in
    Wave(strength: 50, frequency: 10, phase: self.phase)
        .stroke(Color.white.opacity(Double(i) / 10), lineWidth: 5)
        .offset(y: CGFloat(i) * 10)
}
.mask(
    LinearGradient(gradient: Gradient(colors: [.clear, .white, .clear]), startPoint: .leading, endPoint: .trailing)
)
If you liked this, you'd love Hacking with Swift+…
Here's just a sample of the other tutorials, with each one coming as an article to read and as a 4K Ultra HD video.
Find out more and subscribe here
23:07
ADVANCED SWIFT
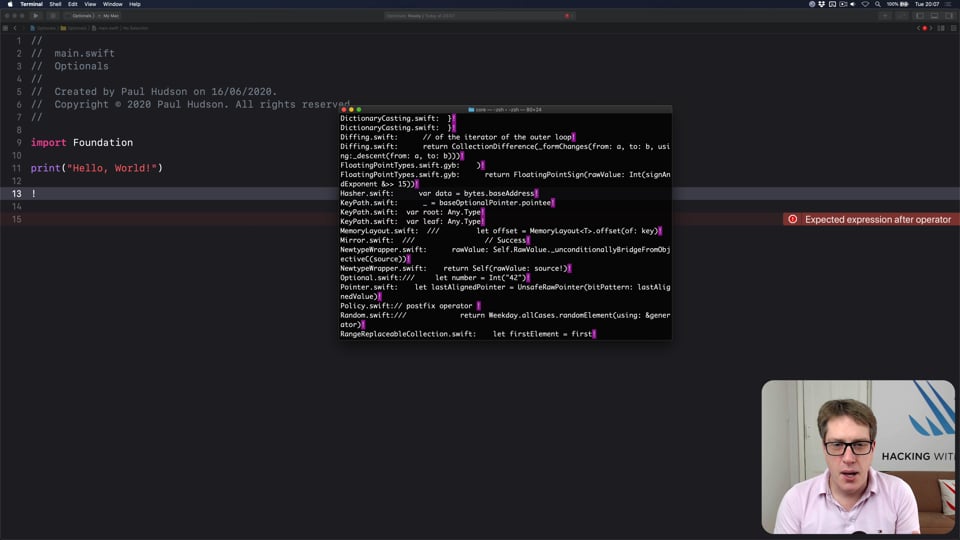
FREE: Making the most of optionals
Swift’s optionals are implemented as simple enums, with just a little compiler magic sprinkled around as syntactic sugar. However, they do much more than people realize, and in this article I’m going to demonstrate some of their power features that can really help you write better code – and blow your mind along the way.
20:01
INTERMEDIATE SWIFT
FREE: Understanding generics – part 1
Generics are one of the most powerful features of Swift, allowing us to write code once and reuse it in many ways. In this article we’ll explore how they work, why adding constraints actually helps us write more code, and how generics help solve one of the biggest problems in Swift.
27:33
INTERMEDIATE SWIFT
FREE: Understanding assertions
Assertions allow us to have Swift silently check the state of our program at runtime, but if you want to get them right you need to understand some intricacies. In this article I’ll walk you through the five ways we can make assertions in Swift, and provide clear advice on which to use and when.
42:32
FUNCTIONAL PROGRAMMING
FREE: Transforming data with map()
In this article we’re going to look at the map() function, which transforms one thing into another thing. Along the way we’ll also be exploring some core concepts of functional programming, so if you read no other articles in this course at least read this one!
31:55
DATA STRUCTURES
FREE: Trees
Trees are an extraordinarily simple, extraordinarily useful data type, and in this article we’ll make a complete tree data type using Swift in just a few minutes. But rather than just stop there, we’re going to do something quite beautiful that I hope will blow your mind while teaching you something useful.
11:03
ULTIMATE PORTFOLIO APP
FREE: Ultimate Portfolio App: Introduction
UPDATED: While I’m sure you’re keen to get started programming immediately, please give me a few minutes to outline the goals of this course and explain why it’s different from other courses I’ve written.
14:26
NETWORKING
FREE: User-friendly network access
Anyone can write Swift code to fetch network data, but much harder is knowing how to write code to do it respectfully. In this article we’ll look at building a considerate network stack, taking into account the user’s connection, preferences, and more.

3:54
INTERVIEW QUESTIONS
FREE: Interview questions: Introduction
Getting ready for a job interview is tough work, so I’ve prepared a whole bunch of common questions and answers to help give you a jump start. But before you get into them, let me explain the plan in more detail…
36:18
HIGH-PERFORMANCE APPS
FREE: Using memoization to speed up slow functions
In this article you’ll learn how memoization can dramatically boost the performance of slow functions, and how easy Swift makes it thanks to its generics and closures.
19:50
SWIFTUI SPECIAL EFFECTS
FREE: Shadows and glows
SwiftUI gives us a modifier to make simple shadows, but if you want something more advanced such as inner shadows or glows, you need to do extra work. In this article I’ll show you how to get both those effects and more in a customizable, flexible way.
6:52
FUNCTIONAL PROGRAMMING
FREE: Functional programming in Swift: Introduction
Before you dive in to the first article in this course, I want to give you a brief overview of our goals, how the content is structured, as well as a rough idea of what you can expect to find.
14:20
INTERMEDIATE SWIFTUI
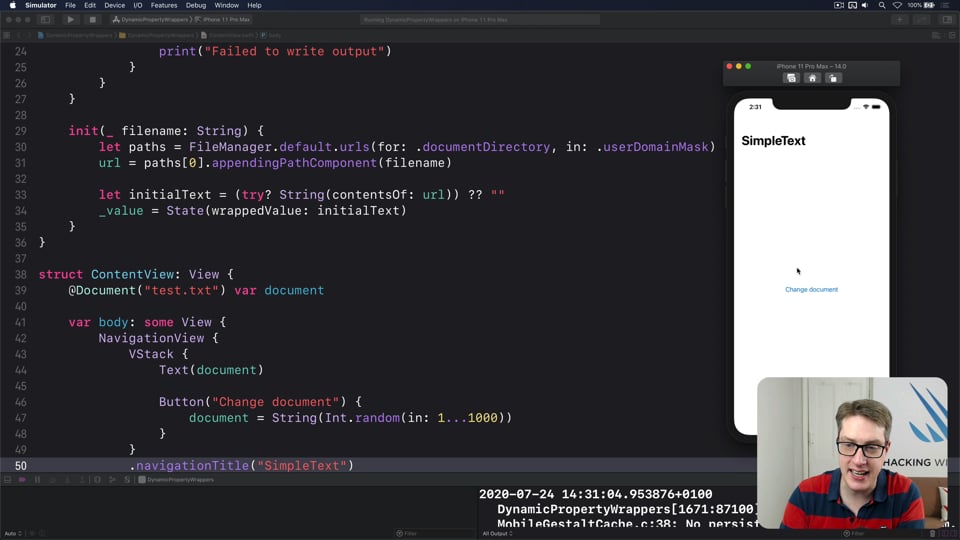
FREE: Creating a custom property wrapper using DynamicProperty
It’s not hard to make a basic property wrapper, but if you want one that automatically updates the body property like @State you need to do some extra work. In this article I’ll show you exactly how it’s done, as we build a property wrapper capable of reading and writing documents from our app’s container.
24:11
ADVANCED SWIFT
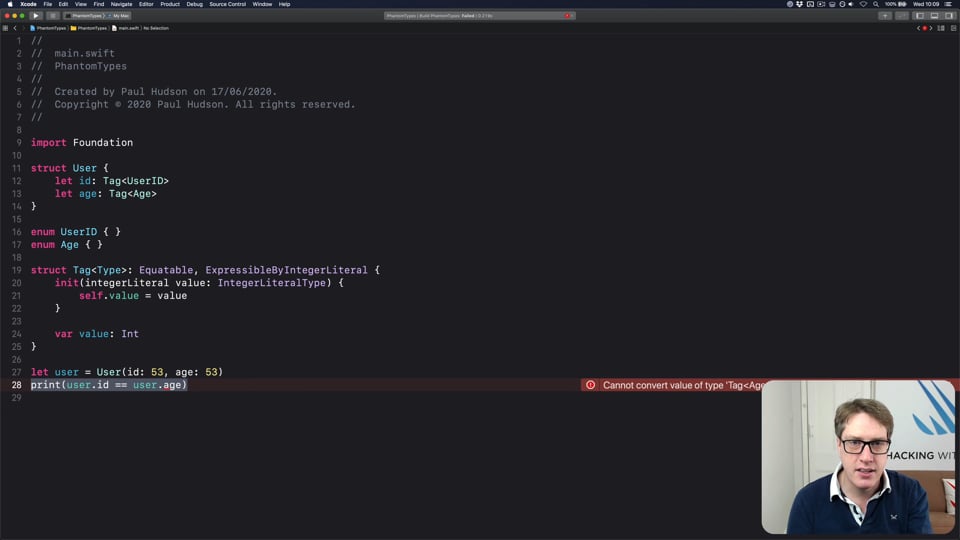
FREE: How to use phantom types in Swift
Phantom types are a powerful way to give the Swift compiler extra information about our code so that it can stop us from making mistakes. In this article I’m going to explain how they work and why you’d want them, as well as providing lots of hands-on examples you can try.
11:12
CUSTOM SWIFTUI COMPONENTS
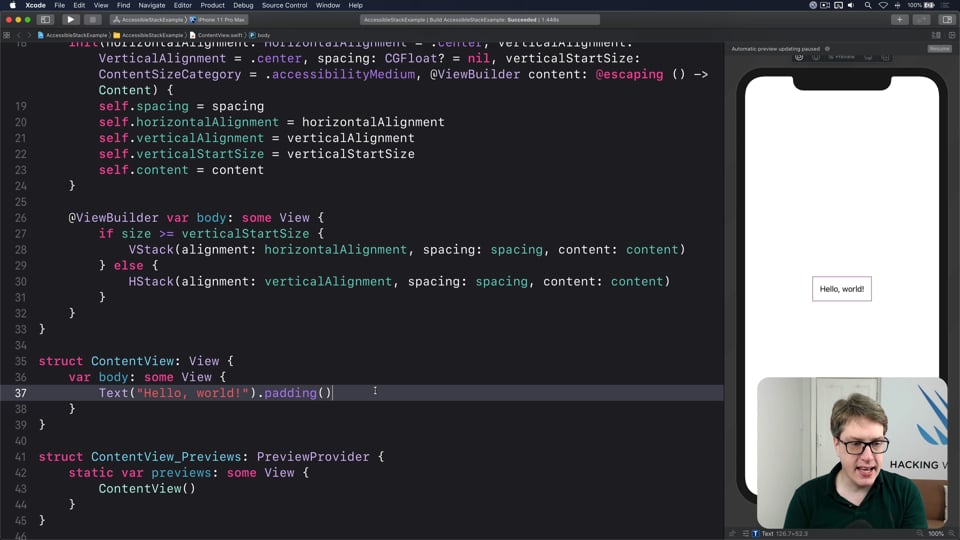
Creating an AccessibleStack that flips stack axis based on Dynamic Type
There are several times when you might want to flip between a HStack and VStack, but one useful option is to look at the Dynamic Type size. Apple uses this itself to switch list rows to a vertical layout when using larger fonts, and in this tutorial I’ll show you how it’s done.
20:24
ADVANCED SWIFT
Making the most of optionals – part 2
I already introduced how the internals of optionals work, including how they use conditional conformance and how to avoid infinitely sized structs. In this video I’m going to go further as we look at how our knowledge of Optional can be translated to Result, why it’s so important that optionals are functors and monads, and more.
32:35
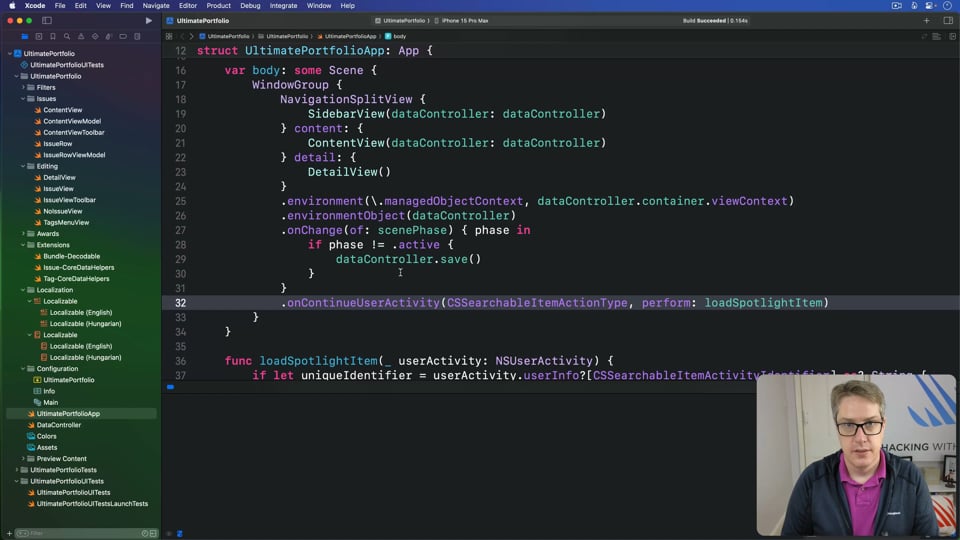
ULTIMATE PORTFOLIO APP
Adding local notifications
UPDATED: Local notifications allow us to set reminders for the user without ever needing to send data off the device. In this article we’re going to add these notifications to our app, so that users can be reminded to work on specific bugs.
16:02
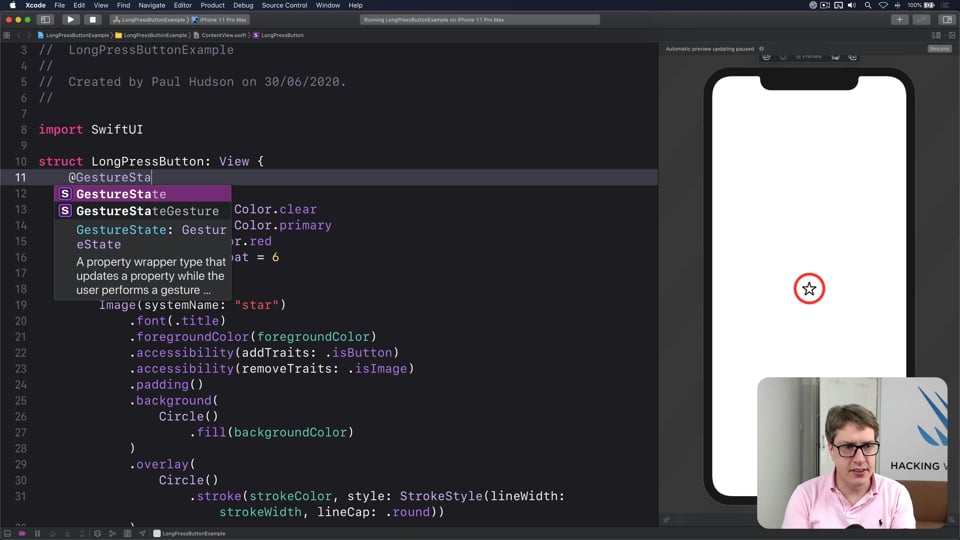
CUSTOM SWIFTUI COMPONENTS
Creating a LongPressButton to trigger after delay
In this article I’m going to walk you through building a LongPressButton with SwiftUI, which will requires users to press and hold for a second before it’s triggered.

3:36
INTERVIEW QUESTIONS
What is the difference between the Float, Double, and CGFloat data types?
This question is partly technical, partly about keeping up with Swift, and partly about application, and and I suggest you tackle it in that order.
27:45
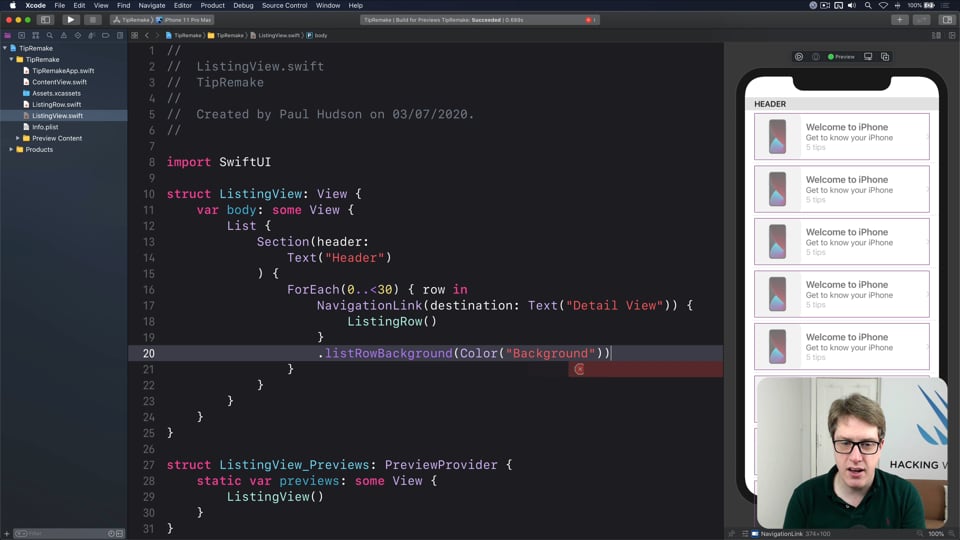
REMAKING APPS
Remaking the Tips app
In this article we’re going to look at how to rebuild the Tips app using SwiftUI, including how to make scrolling tabs of content, how to get a parallax scrolling effect, and more.

2:17
INTERVIEW QUESTIONS
Apart from the built-in ones, can you give an example of property wrappers?
Anyone with even a modicum of SwiftUI experience can name things like @State and @ObservedObject, but this question specifically asks you not to mention the built-in ones so this is more about thinking what property wrappers actually add to our projects.
