GO FURTHER, FASTER: Try the Swift Career Accelerator today! >>

Hovering permanent popup on Slider?

Forums > SwiftUI

Greetings,

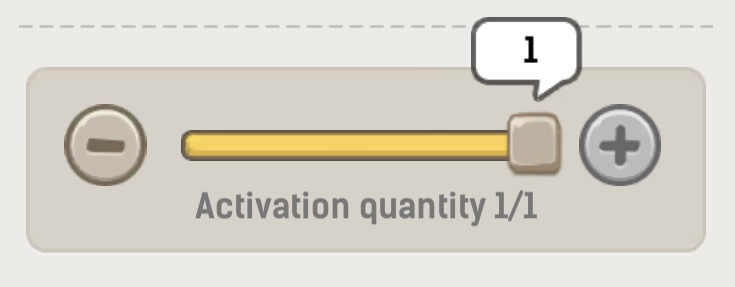
I've searched a lot, but haven't been able to find an answer to my question. I would like to have a permanent popup hovering on a Slider, like I can see here: here

This is from an iOS Game, but I would like to use that in a regular iOS App, in case that makes a difference. Obisously, I want the text to be the value of the Slider :)

Anyone with an idea on how to do that?

Thank you :)

1      

Have not done this. But spitballing some ideas.

  1. Wrap your Slider in a both a ZStack and a GeometryReader to get its bounds.
  2. Use the Slider's onEditingChanged closure to calculate the percentage the Slider is between the low and high values of your slider.
  3. Add code to the onEditingChanged closure to show a balloon view in the ZStack using the calculated bounds from step 2 and some pleasant offset above the Slider's bar.

Please return here and share your solution!

1      

Have done the balloon already, now need to learn about GeometryReader, which will be slightly more complicated. Thanks for the guidance :-)

1      

Hacking with Swift+

TAKE YOUR SKILLS TO THE NEXT LEVEL If you like Hacking with Swift, you'll love Hacking with Swift+ – it's my premium service where you can learn advanced Swift and SwiftUI, functional programming, algorithms, and more. Plus it comes with stacks of benefits, including monthly live streams, downloadable projects, a 20% discount on all books, and more!

Learn more here

Use the search bar at the top of the HackingWithSwift web pages. Look for GeometryReader.

@twoStraws has brilliant examples.

See -> GeometryReader

GeometryReader looks at the space that it is in, and can report back to you useful intel, such as how wide, how tall, center points, etc.

So if you find the geometry of your slider is, say 500 wide x 350 pixels high, and the slider scale is from 1 to 20, and the current slider value is 10 you are 50% of the way on the slider. Therefore you can set your bubble's frame to be offset by 50% of the slider's width, or 250 pixels. More or less.

Nice thing about GeometryReader is that it will adjust values if your View adjusts. If you rotate your device, or add a subview that squishes your slider a bit, GeometryReader will adjust values, and your bubble will be redrawn appropriately. Cool beans!

Please return and let us know if this solution works.

1      

I will need some time on this one. As soon as I wrap the whole thing in a GeometryReader, the text updates once, then does not update anymore. The slider can still move and it looks that the variable storing the value is still being updated, but the text does not update in the hover popup.

1      

Here's some sample code to get you started.
Paste into Playgrounds. (You ARE using Playgrounds, yes?)

// Sample Code for MezzoMix. 2022.04.25
// Paste this code into Playgrounds
struct SliderHack: View {
    @State private var sliderValue         = 40.0   // Some default value
    @State private var showValueBalloon    = false
    private var maxValue                   = 150.0  // Pick your own max value
    private var percentOfScale: Double       { sliderValue / maxValue }
    private var isPastHalfWayPoint: Bool     { sliderValue / maxValue > 0.49}
    var body: some View {
        VStack(alignment: .center, spacing: 20) {
            Text("Show Value Balloon").font(.headline).padding(.vertical)
            ZStack(alignment: .leading) {
                GeometryReader { geo in // capture the geometry of these two views
                    Slider(value: $sliderValue,
                           in: 0...maxValue,
                           onEditingChanged: { isEditing in showValueBalloon = isEditing })

                    ValueBalloon(value: $sliderValue)
                        .animation(.default, value: isPastHalfwayPoint) // smooth transition
                        .opacity(showValueBalloon ? 1.0 : 0.0)  // show when dragging; otherwise hide this view
                    // reposition the balloon if slider is past the half-way point
                        .offset(x: (geo.size.width * percentOfScale - (isPastHalfWayPoint ? 40.0 : -10.0) ), y: 30)
                }.padding(.horizontal)
            }.frame( width: 600, height: 100 )  // frame for the slider and balloon
        }
    }
}

// Simple balloon view
struct ValueBalloon: View {
    @Binding var value: Double
    var body: some View {
        ZStack {
            Circle().foregroundColor(.cyan)
            Text("\(value, specifier: "%.0f")").foregroundColor(.white)
        } .frame(width: 40, height: 40)
    }
}

PlaygroundPage.current.setLiveView(SliderHack() )

1      

That's awesome! Thanks for that. I was not using Playground. I just created a new SwiftUI View file in my project and was experimenting there, so I don't mess up my app, but can still re-use most of the logic and components.

I like how you did the transition when it's passing midpoint, cool animation, but for this app, I'd rather have the Balloon right above the Slider at all time, not before or after, as in the center of the Slider's circle is also the center of the Balloon circle, and they follow each other from start to finish, always on the same X axis. Let me know if that is not clear, I can show it.

How can I get the exact mid point of the Slider's circle? I've tried adding OnTapGesture on both the Slider and the Balloon inside the GeometryReader, like Paul did in his tutorial, but nothing prints at all, so must be doing it wrong.

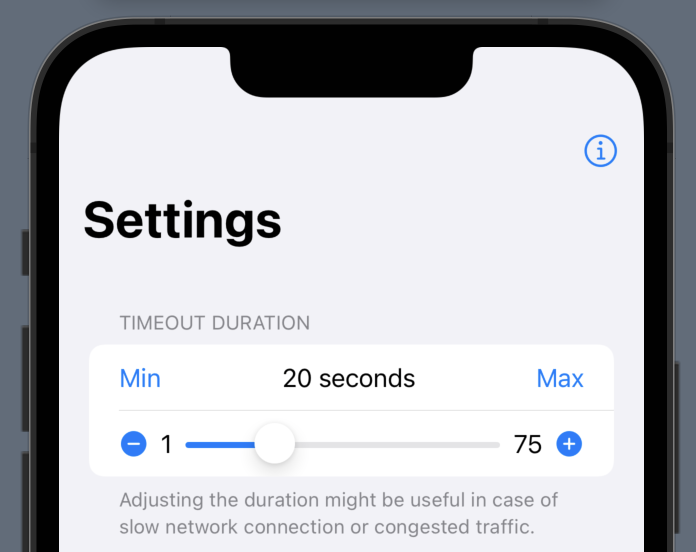
This is what it looks like today in my app:

As you can see, there is already something on the left and the right of the Slider, so I don't have a risk of the balloon being cut or out of bounds of the screen.

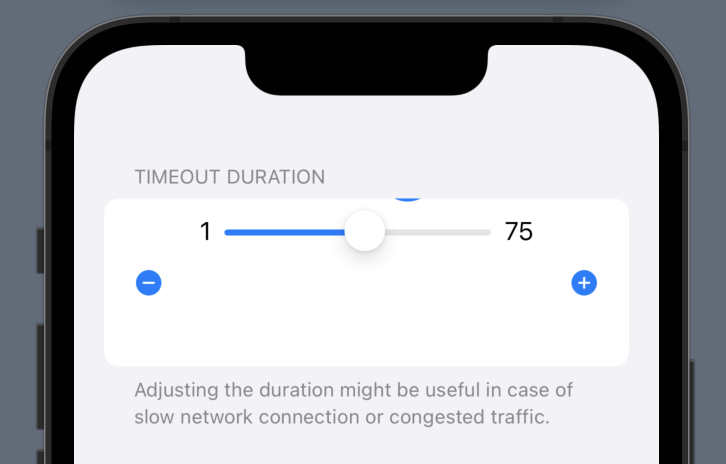
I've tried adding some components from my app code to see how it will render, but there is something I don't get, since my Slider and Balloon are all the way up and I can't figure out how to move it down (yes, would prefer the Balloon on top of the Slider rather than on bottom, and always showing, so I've removed some of your code based on that, since it was not needed anymore):

And here is the code now, after my updates:

import SwiftUI

struct SliderHack: View {
    @State private var sliderValue         = 40.0   // Some default value
    @State private var showValueBalloon    = false
    private var maxValue                   = 75.0  // Pick your own max value
    private var percentOfScale: Double       { sliderValue / maxValue }
    var body: some View {
        Form {
            Section (header: Text("Timeout Duration"), footer: Text("Adjusting the duration might be useful in case of slow network connection or congested traffic.")) {
                HStack {
                    Button(action: {
                        // got some code in my app, not relevant here
                    }, label: {
                        Image(systemName: "minus.circle.fill")
                    })
                    .buttonStyle(BorderlessButtonStyle())
                    .frame(height: 100)
                    VStack(alignment: .center, spacing: 20) {
                        ZStack(alignment: .leading) {
                            GeometryReader { geo in // capture the geometry of these two views
                                ValueBalloon(value: $sliderValue)
                                    .offset(x: (geo.size.width * percentOfScale), y: -44)
                                Slider(value: $sliderValue,
                                       in: 0...maxValue,
                                       step: 1.0,
                                       minimumValueLabel: Text("1"),
                                       maximumValueLabel: Text("75"),
                                       label: {
                                           Text("")
                                   })
                            }.padding(.horizontal)
                        } // end ZStack
                    } // end VStack
                    Button(action: {
                        // got some code in my app, not relevant here
                    }, label: {
                        Image(systemName: "plus.circle.fill")
                    })
                    .buttonStyle(BorderlessButtonStyle())
                } // end HStack
            } // end Section
        } // end Form
    }
}

// Simple balloon view
struct ValueBalloon: View {
    @Binding var value: Double
    var body: some View {
        ZStack {
            Circle().foregroundColor(.blue)
            Text("\(value, specifier: "%.0f")").foregroundColor(.white)
        }
        .frame(width: 40, height: 40)
    }
}

Thank you for you help so far, I'm learning a lot :-)

1      

Figured out the part for the layout for the Slider and now looks better. I just need to figure out how to ake the balloon aligned with the Slider now :-)

I've added .offset(y: 34) on the GeometryReader, after the .padding(.horizontal)

1      

To be honest, watching you learn and progress is WAY more rewarding than just handing out the answer. Keep going!

Now, if I could only convince you to use Playgrounds to test small bits of code snippets.

1      

I'm in Playground now for making this work. I just didn't do it at the time, since the app was already existing and was just trying to add this component on top of my existing code.

Any pointers, at least, as to where, in the code, I can put a print to get the x coordinate of the Slider? Haven't been able to print anything from anywhere so far. That would help to understand where to position the balloon more accurately :-)

1      

Found another way to display the information (not sure if I'm missing something in Playground to actually make the print happen).

And I know now it's not really possible to get the Slider's position, since we also need to account from some spacers, the labels left and right, and other things like that.

Right now I'm trying to get as close as possible to be next to the center if the circle of the Slider, and take it from there.

1      

I think I figured out why in my app the value stopped updating: I'm storing the slider value in an AppStorage, so it's persistent for the next use of the app. As soon as I tried using the same in Playground, the value stopped updating. Lesson learned, I know how to deal with it now :-)

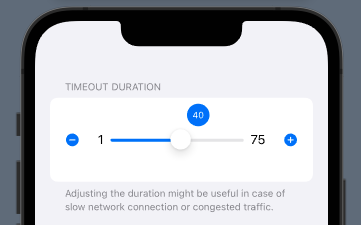
I've managed to do more or less what I wanted, but only works on iPhone 12/13 / iPhone 12/13 Pro screens, due to how I do the offset. I can obviously calculate the exact values for each models, but would rather have something more dynamic here, without a need to do some case selection, detect models and assign values for the offset based on that.

Here is my current code, that you can run on any of the models mentioned above to see how it looks like - hint: great :-) (I've added back the conditional visibility of the balloon :-D):

import SwiftUI

struct SliderHack: View {
    @AppStorage("timeoutValue") var timeoutValue = 5.0
    @State private var sliderValue         = 5.0   // Some default value
    @State private var showValueBalloon    = false
    private var maxValue                   = 75.0  // Pick your own max value
    private var percentOfScale: Double       { sliderValue / maxValue }

    var body: some View {
        Form {
            Section (header: Text("Timeout Duration"), footer: Text("Adjusting the duration might be useful in case of slow network connection or congested traffic.")) {
                HStack {
                    Button(action: {
                        // got some code in my app, not relevant here
                    }, label: {
                        Image(systemName: "minus.circle.fill")
                    })
                    .buttonStyle(BorderlessButtonStyle())
                    .frame(height: 100)
                    VStack(alignment: .center) {
                        ZStack(alignment: .leading) {
                            GeometryReader { geo in // capture the geometry of these two views
                                ValueBalloon(value: $sliderValue)
                                    .offset(x: (((geo.size.width * 0.70) * percentOfScale) + 11.50), y: -32)
                                    .opacity(showValueBalloon ? 1.0 : 0.0)
                                Slider(value: $sliderValue,
                                    in: 1...maxValue,
                                    step: 1.0,
                                    onEditingChanged: { isEditing in
                                    showValueBalloon = isEditing
                                    timeoutValue = sliderValue
                                    },
                                    minimumValueLabel: Text("1"),
                                    maximumValueLabel: Text("75"),
                                    label: {
                                       Text("")
                                })
                                .onAppear{
                                    sliderValue = timeoutValue
                                }
                                HStack {
                                    Spacer()
                                    if sliderValue == 1 {
                                        Text("\(sliderValue, specifier: "%.0f") second")
                                        .offset(y: 40)
                                    } else {
                                        Text("\(sliderValue, specifier: "%.0f") seconds")
                                        .offset(y: 40)
                                    }
                                    Spacer()
                                }
                            }
                            .padding(.horizontal).offset(y: 34)
                        } // end ZStack
                    } // end VStack
                    Button(action: {
                        // got some code in my app, not relevant here
                    }, label: {
                        Image(systemName: "plus.circle.fill")
                    })
                    .buttonStyle(BorderlessButtonStyle())
                } // end HStack
            } // end Section
        } // end Form
    }
}

// Simple balloon view
struct ValueBalloon: View {
    @Binding var value: Double
    @State var frameWidth = 30.0
    @State var frameHeight = 30.0
    var body: some View {
        ZStack {
            Circle().foregroundColor(.blue)
            Triangle2().frame(width: 28, height: 15).foregroundColor(.blue).offset(x: 0, y: 15)
            Text("\(value, specifier: "%.0f")").fontWeight(.bold).foregroundColor(.white).font(.caption)
        }
        .frame(width: frameWidth, height: frameHeight)
    }
}

struct Triangle2: Shape {
    func path(in rect: CGRect) -> Path {
        var path = Path()
        path.move(to: CGPoint(x: rect.midX, y: rect.maxY))
        path.addLine(to: CGPoint(x: rect.minX + 1, y: rect.minY))
        path.addLine(to: CGPoint(x: rect.maxX - 1, y: rect.minY))

    return path
    }
}

1      

When posting code to these forums, place three backticks ``` on the line before your code and three backticks ``` on the line after your code so that it will be formatted properly. You can also highlight an entire code block and click the </> button on the toolbar to wrap the block for you.

This makes it far easier to read and also makes it easier for other posters to copy/paste the code in order to test solutions and such.

Doing this will ensure that you end up with something like this:

func printSomething(_ thing: String?) {
    if let thing = thing {
        print(thing)
    } else {
        print("nothing there")
    }
}

instead of this:

func printSomething(_ thing: String?) { if let thing = thing { print(thing) } else { print("nothing there") } }

1      

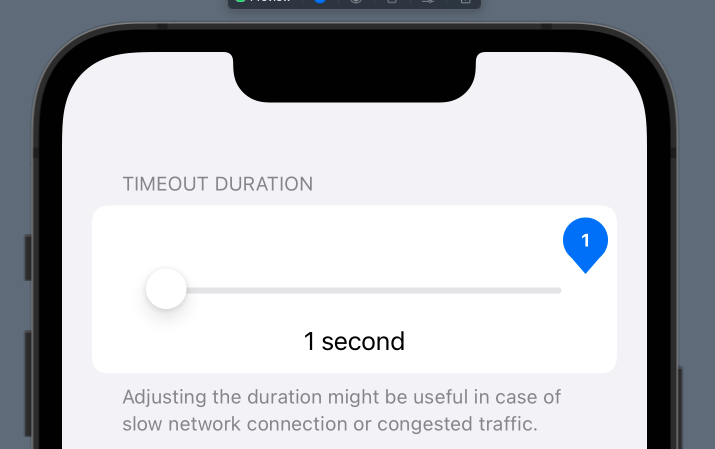
Didn't make much progress, except that the Slider is not starting at 1 (it starts after 1) and ending at the max value set.

I've manually set the balloon to position 1 and position geo.size.width, and we can see it's not really good:

Haven't found yet a logic to use for that.

I've found this on github though: https://github.com/Cuberto/balloon-picker

I don't need the fancy animation, but since it's in Swift and not SwiftUI, I'm really not familiar at all with Swift, so cannot really understand what was done inside and what I could look at to understand how it's done.

I'll keep looking :-)

1      

Hacking with Swift+

TAKE YOUR SKILLS TO THE NEXT LEVEL If you like Hacking with Swift, you'll love Hacking with Swift+ – it's my premium service where you can learn advanced Swift and SwiftUI, functional programming, algorithms, and more. Plus it comes with stacks of benefits, including monthly live streams, downloadable projects, a 20% discount on all books, and more!

Learn more here

Archived topic

This topic has been closed due to inactivity, so you can't reply. Please create a new topic if you need to.

All interactions here are governed by our code of conduct.
 
Unknown user

You are not logged in

Log in or create account
 

Link copied to your pasteboard.