How to create a snow scene with Core Animation
CAEmitterLayer, CAGradientLayer, and CAShapeLayer combine their powers!

CALayer powers so much of the rendering in iOS, but it has also has lots of useful subclasses that do specialized tasks. In this article we’re going to use three of them to build a snowy scene: CAEmitterLayer to make snow fall, CAGradientLayer to draw the background sky, and CAShapeLayer to draw some natural-looking ground. The three combine to look surprisingly good given how little work we do!
We’re going to be wrapping each of our Core Animation layers in a UIView subclass, which makes them significantly easier to position and layout as you’ll see. It will also give you three great, reusable wrapper classes you can add to your own projects, although I expect your users will prefer it if you didn't go overboard!

SPONSORED Join a FREE crash course for mid/senior iOS devs who want to achieve an expert level of technical and practical skills – it’s the fast track to being a complete senior developer! Hurry up because it'll be available only until April 28th.
Sponsor Hacking with Swift and reach the world's largest Swift community!
Step 1: Drawing the sky
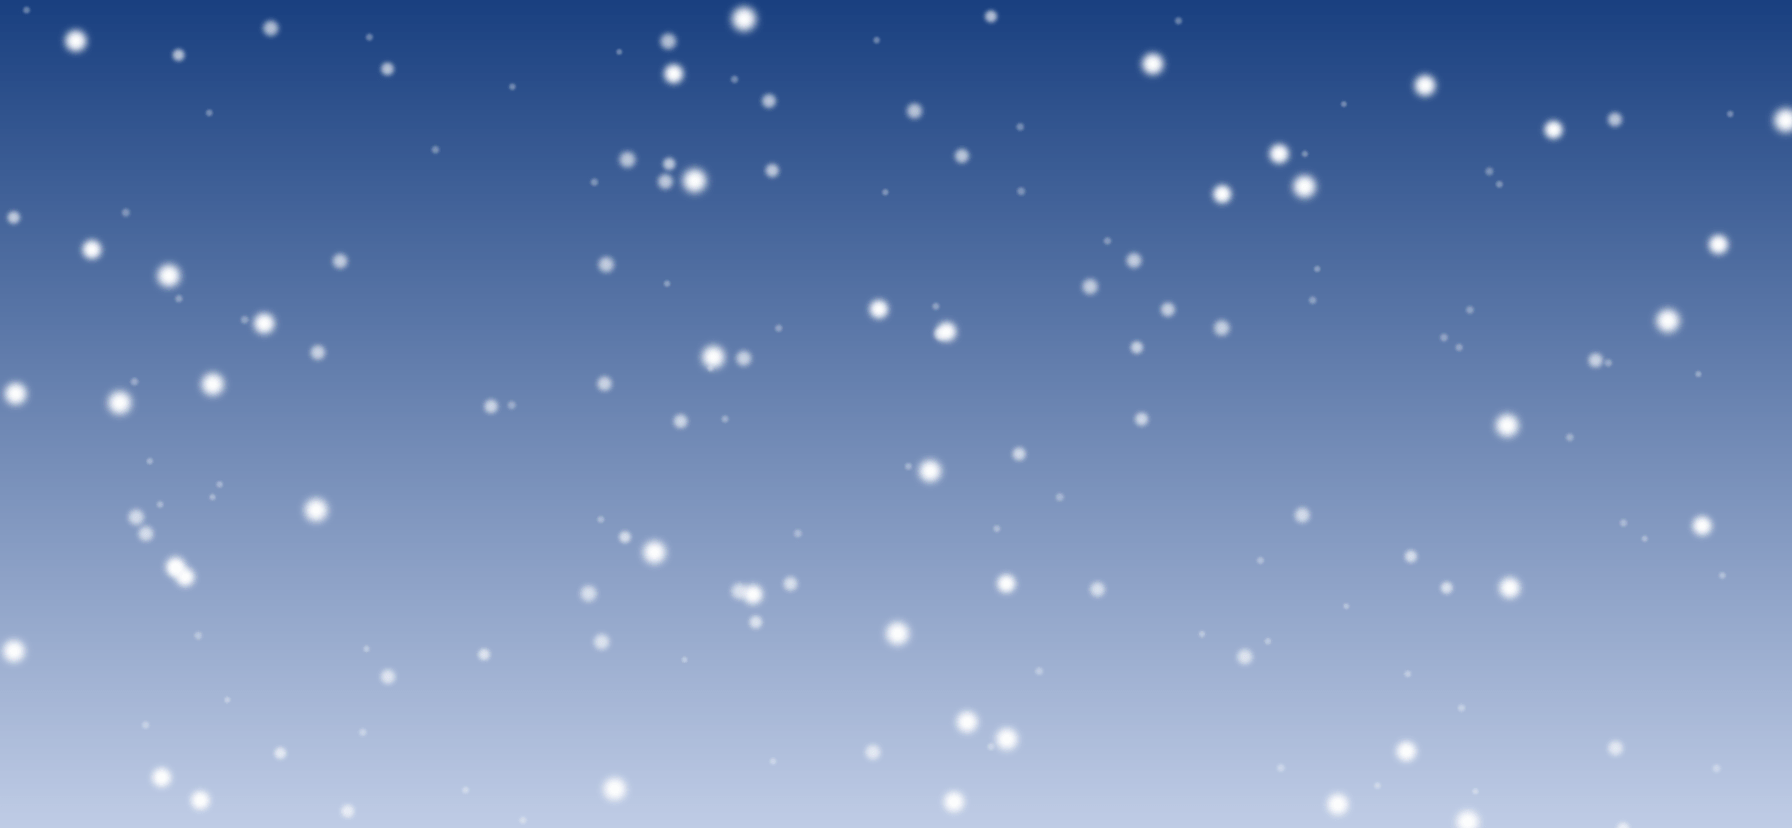
Let’s start off with the easiest part: a nice blue sky for the background. We could place a flat blue UIView back there, but that wouldn’t have quite the snowy feel I’m going for. So, instead we’re going to use a CAGradientLayer with a dark blue gradient.
Create a new iOS project using the Single View App template – this gives us a clean sandbox to work with. Now create a new UIView subclass called “GradientView”, then give it these two properties:
var startColor: UIColor = UIColor.white
var endColor: UIColor = UIColor.white
That lets us control the colors for our gradient remotely, making the class more flexible.
In order for this to act fully as a gradient layer, we need to override the layerClass property for the view. This returns CALayer by default, but we need it to return CAGradientLayer instead. So, add this to the class:
override class var layerClass: AnyClass {
    return CAGradientLayer.self
}
Finally, we need to update our gradient layer’s colors when we’re ready to draw. There are a few ways you can do this, but the easiest is just to override layoutSubviews().
Remember, even though we made layerClass return a gradient layer, Swift will still think layer is a regular CALayer – we need to do a typecast before we can adjust its colors. This is one of the places where a force cast is safe: there’s no point trying to use guard let here because the layer absolutely must be a gradient layer – if it isn’t, something has gone terribly wrong!
Add this method to GradientView now:
override func layoutSubviews() {
    (layer as! CAGradientLayer).colors = [startColor.cgColor, endColor.cgColor]
}
That’s GradientView done already, so we can return to ViewController.swift and create an instance of that for our sky, giving it nice blue colors, then add it to fill our view controller:
override func viewDidLoad() {
    super.viewDidLoad()

    let sky = GradientView()
    sky.startColor = UIColor(red: 0.1, green: 0.25, blue: 0.5, alpha: 1)
    sky.endColor = UIColor(red: 0.75, green: 0.8, blue: 0.9, alpha: 1)
    sky.translatesAutoresizingMaskIntoConstraints = false
    view.addSubview(sky)

    NSLayoutConstraint.activate([
        sky.leadingAnchor.constraint(equalTo: view.leadingAnchor),
        sky.trailingAnchor.constraint(equalTo: view.trailingAnchor),
        sky.topAnchor.constraint(equalTo: view.topAnchor),
        sky.bottomAnchor.constraint(equalTo: view.bottomAnchor),
    ])
}
If you try running the app now you’ll see a gradient going from blue down to almost white at the bottom – a great start!

Step 2: Making it snow
Now for the fun part: we need to add a snow effect. This is where CAEmitterLayer comes in, because it’s specifically designed to create and manipulate particles such as fire, smoke, fog, rain, and snow.
We’re going to create a reusable ParticleView class here, that generates particles at three levels: near, middle, and far. This is done by using the same particle three times, while varying the speed, scale, and alpha to create a depth effect. There are lots of properties we could expose to make this view extremely flexible, but here I’ll just be exposing the particle image because that’s the most important part.
So, go ahead and create another new UIView subclass, this time calling it “ParticleView”. We need to override the same layerClass property as with GradientView, except now we’ll be making it return an emitter layer instead. While you’re there, please also add a property for the particle image, like this:
class ParticleView: UIView {
    var particleImage: UIImage?

    override class var layerClass: AnyClass {
        return CAEmitterLayer.self
    }
}
Particle emitters are made up of two parts: emitter cells, which are individual images with movement, color, scale, rotation, and more, plus the emitter itself, which creates instances of the emitter cells. This division means that you can make multiple kinds of particle fire from a single emitter, but also means you can move all particles simultaneously just by adjusting the emitter.
We’re going to start with the emitter cells, which is what is responsible for deciding what a single snowflake looks like. If you’ve ever used Xcode’s SpriteKit emitter editor you’ll know there are lots of options here: how fast something moves and whether it’s accelerating or decelerating, how rotated something moves and whether it’s spinning, how big something is and whether it’s growing or shrinking, and so on.
For this project, we’re going to write a makeEmitterCell method that takes three parameters: the color to use for the snowflake (varying transparencies of white), how fast it’s falling, and how big it is. We’ll then use those to fill out all the details for the particle:
- The
birthRatewill be 10, which means it will create 10 snowflakes a second - The
lifetimewill be 20, so each snowflake exists for 20 seconds. - The
colorandvelocitywill be set to whatever we passed in. - The
velocityRange– how much individual flakes can be faster or slower than the standardvelocitywill be one quarter of whatever velocity we passed in. - The
emissionLongitude– which direction particles are created in – will be.pi, meaning “straight down.” - The
emissionRange– how much variation in direction we allow – will be.pi / 8, which is about 20 degrees. - The
scalewill be whatever we passed in, andscaleRange– how much to vary the size of the flakes – will be one third of the scale. - The
contentsof the cell – which image it shows – will be the particle image from our emitter view.
So, please add this method to ParticleView now:
func makeEmitterCell(color: UIColor, velocity: CGFloat, scale: CGFloat) -> CAEmitterCell {
    let cell = CAEmitterCell()
    cell.birthRate = 10
    cell.lifetime = 20.0
    cell.lifetimeRange = 0
    cell.color = color.cgColor
    cell.velocity = velocity
    cell.velocityRange = velocity / 4
    cell.emissionLongitude = .pi
    cell.emissionRange = .pi / 8
    cell.scale = scale
    cell.scaleRange = scale / 3

    cell.contents = particleImage?.cgImage
    return cell
}
That method creates one emitter cell, and we’re going to call it three times: one with bright white, large, fast moving snowflakes, one with middling white, smaller, slower moving snowflakes, and one with much dimmer, even smaller, even slower snowflakes. Combined this produces a simple depth effect, as you’ll see.
As with the gradient view, this work needs to happen in layoutSubviews(), where we’ll also configure the emitter to emit particles in a line that’s the full width of our view, centered at our center point.
Add this method to ParticleView now:
override func layoutSubviews() {
    let emitter = self.layer as! CAEmitterLayer

    emitter.emitterShape = .line
    emitter.emitterPosition = CGPoint(x: bounds.midX, y: 0)
    emitter.emitterSize = CGSize(width: bounds.size.width, height: 1)

    let near = makeEmitterCell(color: UIColor(white: 1, alpha: 1), velocity: 100, scale: 0.3)
    let middle = makeEmitterCell(color: UIColor(white: 1, alpha: 0.66), velocity: 80, scale: 0.2)
    let far = makeEmitterCell(color: UIColor(white: 1, alpha: 0.33), velocity: 60, scale: 0.1)

    emitter.emitterCells = [near, middle, far]
}
That’s our second UIView subclass done, so again let’s head back to ViewController.swift and add some more code to viewDidLoad() to bring it to life.
First, add this before the call to NSLayoutConstraint.activate():
let snow = ParticleView()
snow.particleImage = UIImage(named: "snow-particle")
snow.translatesAutoresizingMaskIntoConstraints = false
view.addSubview(snow)
You can use anything you like for the particle image, but if you want to use my image you can get it here.
Just like with the gradient view, we want this particle view to fill the screen. So, add this inside the call to NSLayoutConstraint.activate():
snow.leadingAnchor.constraint(equalTo: view.leadingAnchor),
snow.trailingAnchor.constraint(equalTo: view.trailingAnchor),
snow.topAnchor.constraint(equalTo: view.topAnchor),
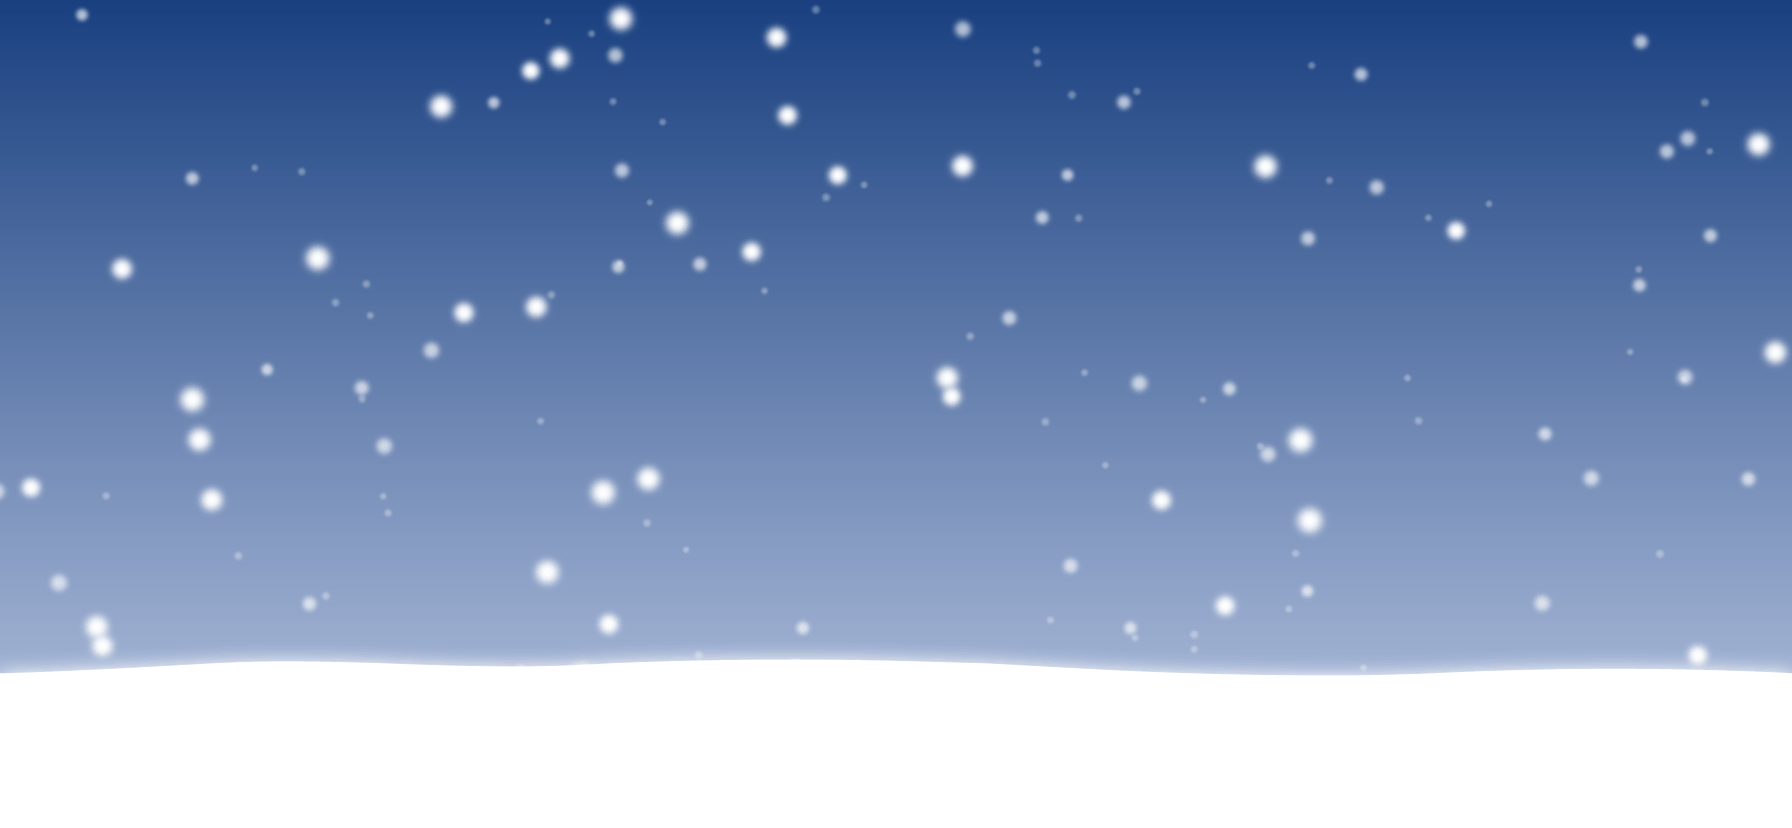
snow.bottomAnchor.constraint(equalTo: view.bottomAnchor),Try running the code now and you should see our scene coming together nicely – gently falling snow against a wintry blue backdrop!
Step 3: Adding the ground
Falling snow naturally collects on the ground, so to finish off our scene we need some white ground. Again, we could use a flat white UIView for that but it doesn’t look great and wouldn’t teach anything, so instead we’re going to use a CAShapeLayer instead.
Shape layers are designed to render whatever path you want, and offer a variety of customization points: stroke color, fill color, line width, and more. For this project we’re going to create a ShapeView class that lets us customize the fill color, stroke color, stroke width, and path, but again you could easily extend this to do more.
Let’s dive into the code. First, we need properties we can customize plus another layerClass override:
class ShapeView: UIView {
    var strokeWidth: CGFloat = 2.0
    var strokeColor: UIColor = UIColor.black
    var fillColor: UIColor = UIColor.clear
    var path: UIBezierPath?

    override class var layerClass: AnyClass {
        return CAShapeLayer.self
    }
}
Next, we need to override layoutSubviews so that it renders our path. This takes a little thinking, because we want to be able to specify any sort of path and have it automatically stretched to fit the available space of our view.
To solve this problem neatly, we’re going to have users specify their paths in normalized coordinates, where X:0 is the left edge of their path and X:1 is the right edge, and Y:0 is the top and Y:1 the bottom. We can then write code to scale up the path by the size of our view, so that it always fits the available space.
One more thing: to make the snow scene look just a little nicer, we’re going to draw on the ability of CAShapeLayer to render shadows. Here, though, we’re going to make the “shadow” the same as our stroke color so that it acts as a glow instead, giving the snow a slightly hazy look.
Add this method to ShapeView now:
 override func layoutSubviews() {
    let layer = self.layer as! CAShapeLayer

    // take a copy of our original path, because we're about to stretch it
    guard let pathCopy = path?.copy() as? UIBezierPath else { return }

    // create a transform that stretches the path by our width and height, and apply it to the copy
    pathCopy.apply(CGAffineTransform(scaleX: bounds.width, y: bounds.height))

    // apply all our properties to the shape layer
    layer.strokeColor = strokeColor.cgColor
    layer.fillColor = fillColor.cgColor
    layer.lineWidth = strokeWidth
    layer.shadowColor = strokeColor.cgColor
    layer.shadowRadius = 5
    layer.shadowOffset = .zero
    layer.shadowOpacity = 1

    // convert the UIBezierPath to a CGPath and use it for the shape path
    layer.path = pathCopy.cgPath
}
That’s our final UIView subclass finished, so now we need to create it inside ViewController.swift.
Creating a Bezier path takes some effort: either you type values in by hand because you’re a mathematics prodigy, you type values in by hand then monkey with them for 20 minutes using trial and error because you’re a mere mortal, or you use something like PaintCode because you realize that paying a small amount of money to buy a code-generating tool pays for itself in only a few days.
It won’t surprise you to learn that I chose the last option: I used PaintCode to draw a simple rectangle with some very gentle curves along the top, and it generated the full UIBezierPath code in Swift for me – nice!
You’re welcome to experiment yourself, or just copy and paste my method below:
func makeGround() -> UIBezierPath {
    let bezierPath = UIBezierPath()
    bezierPath.move(to: CGPoint(x: 0, y: 0.77))
    bezierPath.addLine(to: CGPoint(x: 0, y: 1.0))
    bezierPath.addLine(to: CGPoint(x: 1.0, y: 1.0))
    bezierPath.addLine(to: CGPoint(x: 1.0, y: 0.08))
    bezierPath.addCurve(to: CGPoint(x: 0.80, y: 0.08), controlPoint1: CGPoint(x: 1.0, y: 0.08), controlPoint2: CGPoint(x: 0.91, y: 0.02))
    bezierPath.addCurve(to: CGPoint(x: 0.55, y: 0.02), controlPoint1: CGPoint(x: 0.69, y: 0.13), controlPoint2: CGPoint(x: 0.56, y: 0.02))
    bezierPath.addCurve(to: CGPoint(x: 0.34, y: 0.02), controlPoint1: CGPoint(x: 0.54, y: 0.02), controlPoint2: CGPoint(x: 0.44, y: -0.03))
    bezierPath.addCurve(to: CGPoint(x: 0.112, y: 0.024), controlPoint1: CGPoint(x: 0.25, y: 0.08), controlPoint2: CGPoint(x: 0.20, y: -0.03))
    bezierPath.addCurve(to: CGPoint(x: 0, y: 0.08), controlPoint1: CGPoint(x: 0.02, y: 0.08), controlPoint2: CGPoint(x: 0, y: 0.08))

    return bezierPath
}
I’ve made it a separate method so that we don’t clutter up viewDidLoad().
With that helper method in place, the rest is a cinch. First, we need to make a ShapeView, giving it our ground as its path and using white for both its fill and stroke color. Put this code before the call to NSLayoutConstraint.activate():
let ground = ShapeView()
ground.path = makeGround()
ground.strokeColor = .white
ground.fillColor = .white
ground.translatesAutoresizingMaskIntoConstraints = false
view.addSubview(ground)
Finally, we need to add some constraints that make the snow take up the full width of our view controller, but pin it so that it takes up only the bottom 20%. Add this inside the call to NSLayoutConstraint.activate():
ground.leadingAnchor.constraint(equalTo: view.leadingAnchor),
ground.trailingAnchor.constraint(equalTo: view.trailingAnchor),
ground.bottomAnchor.constraint(equalTo: view.bottomAnchor),
ground.heightAnchor.constraint(equalTo: view.heightAnchor, multiplier: 0.2)
Run the code one last time and admire your handiwork: a smooth gradient, falling snow, and snowdrifts along the bottom – all using dynamically-generated layouts, so it scales beautifully across all device sizes.
To complete the snowy look, you can turn the status bar white and hide the home indicator with couple of overridden properties in ViewController.swift:
override var preferredStatusBarStyle: UIStatusBarStyle {
    return .lightContent
}

override var prefersHomeIndicatorAutoHidden: Bool {
    return true
}
Perfect!
What next?
Each of the three UIView subclasses is useful in its own right – I combined them here to prove a point rather than suggesting you add snow scenes to your app!
But if you want to make these truly reusable then you should look at the properties they have: you should add more properties to fully express the range of customization points you want to offer, so that you can create different kinds of effects without having to modify the layer code directly.
You should also look into adding @IBDesignable and @IBInspectable to the views, allowing you some control over them in Interface Builder. Even if you choose not to use IB yourself, it costs nothing to make them work for others.
SPONSORED Join a FREE crash course for mid/senior iOS devs who want to achieve an expert level of technical and practical skills – it’s the fast track to being a complete senior developer! Hurry up because it'll be available only until April 28th.
Sponsor Hacking with Swift and reach the world's largest Swift community!


